
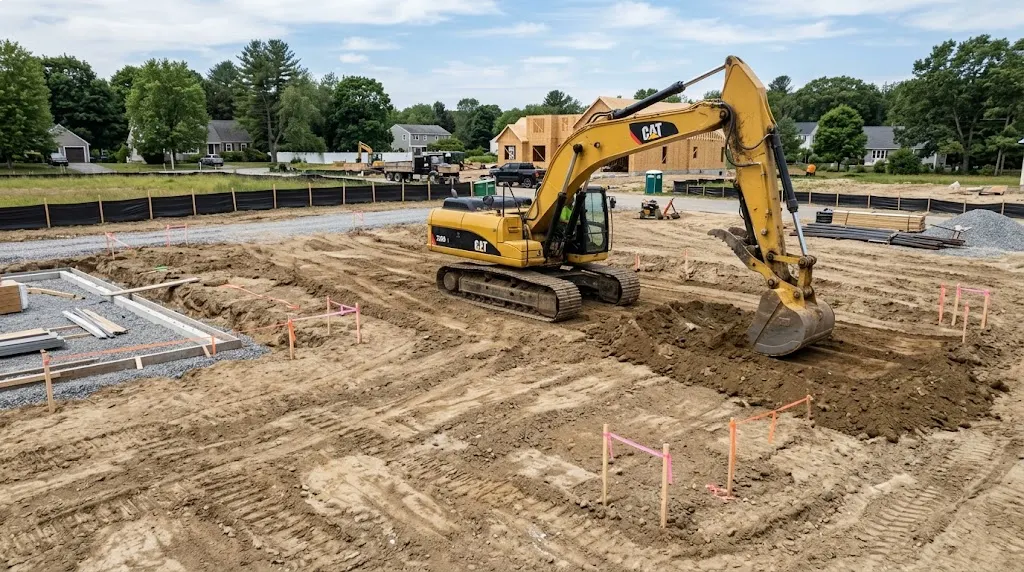
Preparing a site for foundation construction takes five main steps: survey the land, test the soil, clear all debris and vegetation, grade the ground so water flows away from the structure, then compact the soil to the right density. Skipping any step raises the risk of cracks, settling, or water damage later.
Every strong building starts with dirt. Not the finished concrete, not the framing, not the roof—the ground underneath. If that ground isn’t ready, nothing you build on top of it will last the way it should.
Site preparation sounds like a small step compared to the actual construction. It isn’t. Most foundation failures trace back to something that went wrong before a single truck of concrete arrived. The good news is that these problems are almost entirely preventable. You just need to follow the right steps in the right order.
Why Site Preparation Sets the Tone for the Whole Build
A foundation only performs as well as the ground beneath it. Soil that hasn’t been tested, graded, or compacted properly will shift over time. That shifting shows up later as cracks in walls, doors that stick, or water pooling where it shouldn’t.
Fixing a foundation after the fact costs far more than doing the prep work right the first time. You’re talking about lifting a structure, replacing soil, or installing drainage systems around an existing building. Compare that to a few extra days of grading and compaction before construction starts, and the choice becomes obvious.
Think of site preparation as buying insurance for your entire project. You’re not just building a foundation. You’re protecting everything that goes on top of it for decades.
Start With a Site Survey and Soil Test

Before anyone touches a shovel, you need to know what you’re working with. A site survey maps out the property boundaries, elevation changes, and existing features like trees, slopes, or drainage paths. This gives your builder or engineer a clear picture of the land.
Soil testing comes next, and this step matters more than most people realize. A geotechnical report tells you the soil’s composition, its moisture content, and how much weight it can bear without shifting. This information decides how deep you need to dig and whether the native soil can stay in place or needs to be replaced with engineered fill.
Clay-heavy soil, for example, expands when wet and shrinks when dry. That kind of movement puts constant stress on a foundation if it isn’t addressed early. A soil test catches this before it becomes your problem.
If you’re planning a septic system, a percolation test checks how fast water drains through the soil. In areas with certain types of bedrock, a radon test might also be worth doing. None of these tests take long, but skipping them can cost you thousands down the road.
Clear the Land Completely
Once you know what the soil looks like, it’s time to clear the site. This means removing trees, stumps, roots, brush, and any leftover debris from the property. It sounds straightforward, but this step gets rushed more often than any other.
Here’s why it matters. Roots and organic material left in the ground will eventually decay. When they break down, they leave gaps and voids beneath the surface. A foundation sitting above one of those voids has nothing solid to rest on, and settling becomes almost guaranteed.
Clearing also removes rocks and large debris that could interfere with grading equipment or create uneven spots in your excavation. A clean site gives every following step a fair starting point.
Grade the Land So Water Moves Away From Your Foundation
Water is the biggest threat to any foundation. Left unchecked, it pools around the base of a structure, seeps into cracks, and slowly weakens everything it touches. Grading solves this problem before it starts.
Grading reshapes the land so it slopes gently away from where the foundation will sit. Building codes typically call for a slope of at least a few inches over several feet, measured out from the wall. That slight angle is enough to carry rainwater away instead of letting it collect near the structure.
If your lot isn’t naturally flat, you’ll need cutting and filling to even things out. Soil gets moved from the high points to the low points until the site reaches the elevation your plans call for. A civil engineer or grading contractor usually handles this part, since getting the slope wrong in either direction creates its own set of problems.
Swales and berms sometimes come into play here too. These are shaped channels and raised sections of earth that guide water in a specific direction, especially on sites where a natural slope isn’t enough on its own.
Compact the Soil to Prevent Future Settling
Grading gets the shape right. Compaction makes it stay that way. This step presses the soil particles together tightly, squeezing out air pockets and creating a dense, stable base for everything built on top of it.
Without proper compaction, soil settles unevenly over time. That uneven settling is exactly what causes cracked slabs, sagging floors, and stress points in concrete. Heavy rollers and mechanical compactors do this work, pressing down layer by layer until the soil reaches the density your engineer specifies.
Moisture plays a big role in how well compaction works. Soil that’s too dry won’t pack down evenly, while soil that’s too wet becomes soft and unstable. Contractors often test the moisture level before compacting and adjust it if needed, adding water or letting the ground dry out until conditions are right.
Compaction testing follows each layer of fill to confirm it meets the required standard before the next layer goes down. This step-by-step check keeps small problems from turning into big ones later.
Excavate With Precision
Excavation is where the site starts to take the actual shape of your foundation. Digging too shallow leaves weak, unstable soil in place. Digging too deep wastes time, money, and material replacing soil you didn’t need to remove.
The goal is a controlled, even excavation that matches what your foundation plans call for. The bottom of the dig should be relatively flat, with a slight slope built in so water doesn’t collect at the base. Even a small grade here, measured in fractions of an inch per foot, makes a real difference in keeping moisture away from your foundation once it’s poured.
Precision matters just as much here as it does with grading. Any low spots or uneven sections need to be corrected before you move forward, since fixing them after the foundation is poured is far harder and far more expensive.
Deal With Problem Soil Before It Becomes a Problem
Sometimes soil testing turns up bad news. Weak soil, expansive clay, or contamination all call for a different approach than standard grading and compaction. Catching these issues now, before construction starts, is far better than discovering them after the fact.
Depending on what your geotechnical report finds, a few solutions might come into play. Replacing the weak soil with engineered fill is one option. Stabilizing the existing soil with lime or cement is another. In more serious cases, deep foundation systems like piles or caissons carry the structure’s weight down to more stable ground below the surface.
None of these fixes are cheap, but they’re a lot cheaper than dealing with a failing foundation years after the building is finished. If your engineer recommends one of these approaches, it’s worth listening.
Locate Underground Utilities Before You Dig
Before any major digging happens, existing underground utilities need to be marked and mapped out. This includes water lines, gas lines, electrical conduits, and sewer connections. Hitting one of these during excavation isn’t just costly. It can be dangerous.
Most areas have a utility marking service you can call before digging begins, and many places require it by law. Getting this step done early avoids delays once construction is underway and keeps your crew safe on the job site.
Bring In the Right Professionals
Site preparation isn’t something to handle alone, even on a smaller project. Geotechnical engineers interpret soil test results and recommend the right foundation depth. Excavation contractors handle the heavy equipment work safely and accurately. Civil engineers create the grading plans that guide water away from your structure.
Working with experienced professionals at each stage costs money upfront, but it protects you from the much larger expense of fixing a damaged foundation later. A solid team gets the ground ready the right way, so the building you put on top of it has the best possible start.
Getting site preparation right takes patience and a bit of upfront investment, but it pays off every single day your foundation stands strong. Skip a step here, and you’re gambling with the one part of your building you can’t easily go back and fix. Take the time to survey, test, clear, grade, compact, and excavate properly, and your foundation will do exactly what it’s supposed to do for decades to come.


Comments are closed.