
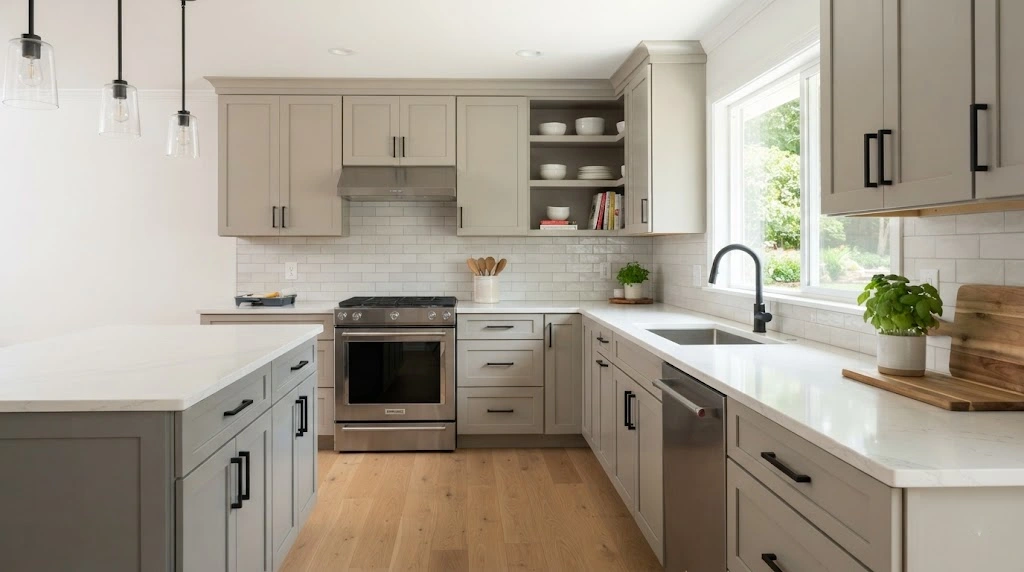
Tired of looking at the same old kitchen cabinets but not ready to spend thousands on a full remodel? Painting your cabinets is one of the fastest, cheapest ways to transform your kitchen — and the good news is, you don’t always have to sand first.
Sanding is messy, time-consuming, and honestly the part most DIYers dread most. Skip it the right way, though, and you can still get a smooth, durable, professional-looking finish. This guide walks you through exactly how to paint kitchen cabinets without sanding, what tools and materials you’ll need, and how to keep your newly painted cabinets looking great for years.
Can You Really Skip Sanding?

Before you grab a brush, take a few minutes to check whether your cabinets are actually good candidates for a no-sand paint job.
Skip sanding if your cabinets:
- Have a smooth, non-glossy surface
- Are in solid condition with no peeling or flaking finish
- Are raw or unvarnished wood
- Don’t have deep scratches, gouges, or water damage
You’ll likely need to lightly sand if your cabinets:
- Have peeling, chipping, or bubbling paint
- Feature a very high-gloss finish
- Are made of laminate or thermofoil (these often need special primers and prep)
- Have deep scratches or dents that need smoothing out
If your cabinets fall into the second group, a light scuff-sand in problem areas is worth the extra effort — it’ll save you from a paint job that peels within a year. But if your cabinets are in decent shape, you can move straight to prep work using chemical deglossers instead of sandpaper.
Materials and Tools You’ll Need
Having everything on hand before you start will save you multiple trips to the hardware store mid-project. Here’s your shopping list:
- 2½-inch angled brushes
- Bonding primer made specifically for cabinets
- Clean rags
- Deglosser or liquid sandpaper
- Drop cloths
- Grease-cutting soap (or a simple vinegar-and-water mix)
- High-quality cabinet paint in a satin or semi-gloss finish
- Microfiber sponges or melamine cleaning pads
- Paint trays
- Painter’s tape
- Protective topcoat (optional but recommended)
- Small 4–6 inch foam or microfiber rollers
A note on paint: Look for paint labeled for trim or cabinetry work — these are typically enamel-based formulas built to handle daily wear, moisture, and grease. Higher-sheen finishes tend to be more durable than flatter ones, though today’s cabinet-specific latex paints have come a long way and now rival oil-based products for a smooth, self-leveling finish without the strong fumes or long dry times.
Step-by-Step: How to Paint Cabinets Without Sanding
Once you’ve confirmed your cabinets are ready and your supplies are gathered, follow these steps for a smooth, lasting finish.
1. Prep Your Kitchen
Clear everything off your countertops and empty your cabinets completely. Remove all doors, drawers, and hardware, and label each piece (a piece of painter’s tape with a number works well) so reassembly is painless later. Lay down drop cloths to protect your floors, countertops, and appliances from drips and splatters.
2. Clean and Degrease Every Surface
Kitchen cabinets accumulate a surprising amount of grease and grime, even ones that look clean. Wipe down every surface with a grease-cutting soap or a vinegar-and-water solution, paying extra attention to areas near the stove and range hood. A microfiber sponge or melamine cleaning pad works well on stubborn buildup. Rinse thoroughly and let everything dry completely — any leftover moisture or residue will affect how well the paint sticks.
3. Apply a Deglosser or Liquid Sandpaper
This is the step that replaces traditional sanding. A deglosser (also called liquid sandpaper) chemically breaks down the top layer of the existing finish so paint has something to grip onto. Apply it following the product’s instructions, wearing gloves and working in a well-ventilated space — these products contain strong chemicals. Let the surface dry fully before moving to priming.
4. Prime the Cabinets
Even with a deglosser, priming is a non-negotiable step. Use a bonding primer formulated for cabinets, and apply it with your angled brush or small roller, working with the direction of the wood grain. Smooth out drips as you go, since they’re much easier to fix wet than dry. Most bonding primers need about two hours to dry, but check your product label for exact times.
5. Paint With Smooth, Even Strokes
Now for the fun part. Apply your first coat in thin, even layers — resist the urge to load up your brush or roller to save time, since thick coats lead to drips and uneven texture. Let each coat dry fully before adding the next. Most cabinets need two to three coats for solid, even coverage, depending on your paint’s quality and the color you’re covering.
Pro tips for a flawless finish:
- Strain your paint through a mesh strainer or old pantyhose before use to remove any dust or debris that could show up in your finish.
- Pour paint into a separate container rather than dipping straight from the can — this keeps the rest of your paint supply clean.
- Use light, long strokes and always finish each section in one direction to avoid visible brush marks.
- A high-density foam roller paired with brush work in corners gives the smoothest, most professional-looking result.
6. Reassemble and Add Finishing Touches
Once your final coat has fully cured (check the can for cure time — it’s often longer than dry time), reattach your doors, drawers, and hardware. This is also the perfect moment to swap in new knobs or pulls. Updated hardware is inexpensive but makes a big visual difference alongside your fresh paint color.
How to Choose the Right Cabinet Paint
Your paint choice affects both the final look and how long that finish will last.
- Color: Light colors like white, cream, or soft gray can make a small kitchen feel more open and airy, while deeper tones like navy or forest green add richness and a modern, upscale feel. Always test a sample on your actual cabinets under your kitchen’s lighting before committing — colors can look completely different on a swatch than on your walls.
- Finish: Satin and semi-gloss finishes strike the best balance for cabinets — they’re easier to clean than matte finishes and hide minor imperfections better than high-gloss.
- Durability: Look for paint rated for high-traffic or high-moisture areas, since kitchens deal with steam, splatters, and constant handling.
A few well-regarded options to consider:
- Cabinet-specific lines from major paint brands like Behr or Benjamin Moore
- Low-VOC or zero-VOC latex paints designed for interior trim and cabinetry
- Air-purifying or low-odor varnishes for kitchens where ventilation is limited
Common Cabinet Painting Mistakes to Avoid
Even a solid plan can go sideways if you fall into these common traps:
- Skipping labels on doors and hardware. Without a system, reassembly turns into a frustrating puzzle.
- Painting in dim lighting. Poor lighting hides drips, streaks, and missed spots until it’s too late to fix them easily.
- Rushing dry times. Recoating too soon leads to peeling, tackiness, and an uneven finish.
- Skipping the cleaning step. No amount of good paint will stick well to a greasy surface.
- Using cheap, all-purpose paint. Cabinet-grade paint costs more for a reason — it’s built to handle daily wear that wall paint simply can’t.
How to Maintain Your Newly Painted Cabinets
A little regular care goes a long way toward protecting your investment:
- Wipe up spills and splatters right away, especially near the stove.
- Clean with a soft, damp cloth — harsh chemicals and abrasive scrubbers can dull or damage the finish over time.
- Touch up small chips or scratches as soon as you notice them, before they spread.
- Consider a clear protective topcoat every few years, especially on high-traffic doors and drawers, for extra durability.
Other Ways to Update Your Cabinets
Painting isn’t the only option if you want a kitchen refresh. A couple of alternatives worth considering:
- Cabinet refacing: This involves replacing your doors and drawer fronts while covering the existing cabinet boxes with a matching veneer. It’s a good choice if your cabinet boxes are structurally solid but you want a totally different look — and it’s another opportunity to upgrade your hardware.
- Hiring a professional painter: If the project feels too big to tackle yourself, a professional has the equipment, experience, and time to deliver consistent, high-quality results without the trial and error.
What Does It Cost to Update Kitchen Cabinets?
Your budget will look very different depending on which route you choose. According to cost data from Angi, here’s roughly what to expect:
- DIY cabinet painting: Around $200–$600 for paint and supplies
- Professional cabinet painting: Typically $423–$1,436
- Cabinet refacing: Roughly $4,300–$10,100, depending on materials and labor
For most homeowners on a budget, DIY painting offers the biggest visual impact for the smallest cost.
Final Thoughts
Painting your kitchen cabinets without sanding is one of the most budget-friendly ways to completely change the feel of your kitchen — no full renovation required. The key to a professional-looking result isn’t skill so much as patience: clean thoroughly, degloss properly, prime well, and don’t rush your coats.
If your cabinets have significant damage or a stubborn glossy finish, a little targeted sanding will still pay off in the long run. And if the whole project feels like more than you want to take on, a professional painter can get you the same fresh look without the weekend of work.
Either way, a new coat of paint might be all your kitchen needs to feel brand new again.


Comments are closed.