
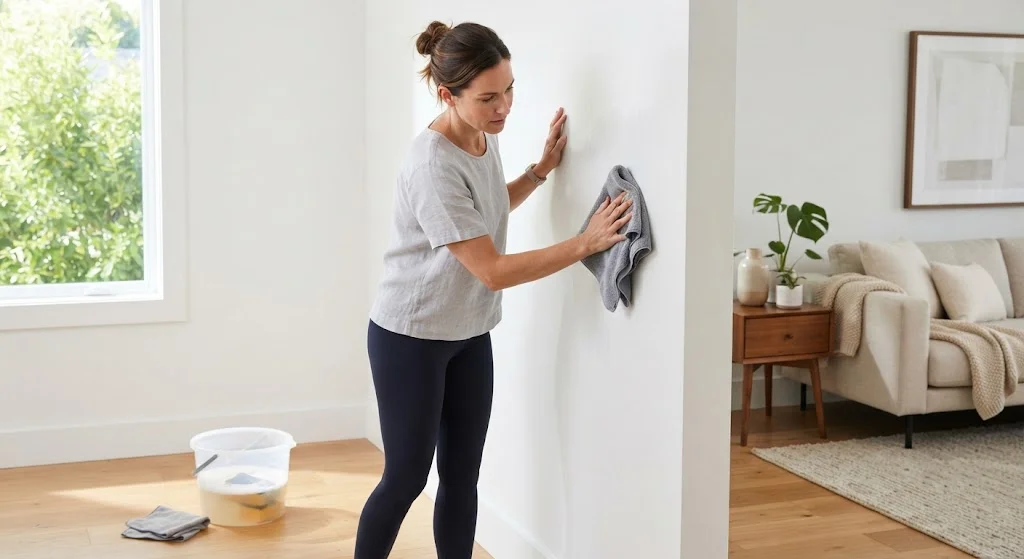
To clean walls, dust them first with a dry microfiber cloth or vacuum brush attachment. Mix warm water with a few drops of mild dish soap, then wipe from the top down using a soft sponge. Rinse with clean water and dry with a towel. Test any solution in a hidden spot first.
Walls take a beating. Kids touch them with sticky hands. Pets brush against them. Cooking oil drifts through the air and settles on kitchen walls without you even noticing. Over time, all that grime builds up, and your once-bright room starts to look tired and dull.
The good news is that cleaning walls doesn’t have to be hard. You don’t need fancy tools or expensive products. You just need the right method for your wall type, a little patience, and about an hour or two of your time.
This guide walks you through everything, from figuring out what kind of paint you have to tackling stubborn stains without ruining your walls in the process.
Why You Should Clean Your Walls Regularly
Most people clean their floors every week and forget their walls exist. But walls collect dust, allergens, and grease just like every other surface in your home. That buildup doesn’t just look bad. It can trigger allergies and make your whole house feel less fresh, even after you’ve vacuumed and dusted everything else.
Clean walls also protect your paint job. Dirt and oil can eat away at the finish over time, especially in kitchens and bathrooms where grease and steam are constant. A quick wipe-down now saves you from an expensive repaint later.
Try to dust your walls once a month and give them a deeper wash two or three times a year. High-traffic areas like hallways and kids’ rooms might need attention more often.
Figure Out Your Wall’s Paint Finish First
Before you grab a sponge, take a minute to figure out what kind of paint is on your walls. This matters more than you’d think, because the wrong cleaning method can leave streaks, dull spots, or even strip the paint entirely.
Flat and matte finishes are the most delicate. They soak up moisture easily and scratch if you scrub too hard. Stick to gentle wiping and avoid pressing down.
Eggshell and satin finishes sit in the middle. They handle a bit more moisture and light scrubbing without much trouble.
Semi-gloss and high-gloss finishes are the toughest. You’ll usually find these in kitchens and bathrooms because they stand up well to grease, steam, and repeated washing.
If you’re not sure which finish you have, test a small patch in a closet or behind a door first. Wipe it with a damp cloth and see how it holds up before you clean the whole room.
What You’ll Need
Gathering your supplies ahead of time makes the whole job go faster. You’ll want a vacuum with a soft brush attachment, a couple of microfiber cloths, a soft sponge, two buckets, mild dish soap, and a pair of rubber gloves. Keep an old towel handy too, so you can lay it along the baseboards and catch any drips.
Skip anything with bleach, ammonia, or harsh abrasives unless you’re dealing with a serious stain on a durable, glossy wall. Most everyday dirt comes off with warm water and a small amount of soap.
Step One: Dust Before You Wash
This step gets skipped a lot, but it makes a real difference. If you go straight to washing without dusting first, you end up rubbing dirt and dust into the wall instead of lifting it off. That can leave smudges and streaks that are harder to fix later.
Use the soft brush attachment on your vacuum and run it along the walls from ceiling to floor. Pay extra attention to corners and the tops of doorframes, where dust tends to collect. If you don’t have a vacuum attachment handy, a dry microfiber cloth or a duster works too.
Don’t forget the baseboards. Once you’re done dusting the walls, run the vacuum along the floor to pick up whatever fell.
Step Two: Mix Your Cleaning Solution
Fill one bucket with warm water and add a few drops of mild dish soap. That’s really all most walls need. Fill a second bucket with plain water for rinsing as you go.
If you’re dealing with grease in the kitchen, you can add a splash more soap or use a gentle degreasing cleaner instead. For bathrooms, a mix of warm water and a small amount of white vinegar helps cut through soap scum and mildew.
Whatever solution you choose, test it on a hidden spot first. Try a corner behind furniture or inside a closet. Wait a few minutes and check for any discoloration or damage before you move on to the rest of the wall.
Step Three: Wash From the Bottom Up
Here’s a trick a lot of people don’t know: wash your walls starting at the bottom and working your way up. It sounds backward, but it prevents dirty streaks. If you start at the top, soapy water drips down and leaves marks on the clean sections below.
Dip your sponge into the soapy water and wring it out well. You want it damp, not dripping. Wipe the wall using gentle, circular motions, and avoid pressing too hard, especially on flat or matte paint.
Work in small sections, about two or three feet at a time. Rinse your sponge often in the second bucket of clean water so you’re not just moving dirt around. Once you finish a section, go over it again with a clean, damp cloth to remove any leftover soap residue, then dry it with a towel.
Step Four: Tackle Stains and Marks
Regular washing handles most everyday grime, but some marks need extra attention. Crayon marks often come off with a bit of baking soda paste rubbed gently in circles. Scuff marks from shoes or furniture usually lift with a melamine foam sponge, sometimes called a magic eraser.
Just be careful with these sponges. They’re mildly abrasive, and on flat or matte paint, they can dull the finish if you scrub too much. Test a small spot first, and use light pressure.
For grease stains in the kitchen, a slightly stronger soap solution or a degreasing spray usually does the trick. Spray it on, let it sit for a minute, then wipe clean with a damp cloth.
Ink and marker stains are the trickiest. Rubbing alcohol on a cotton ball can help, but it’s risky on painted surfaces, so always test first and dab rather than rub.
Step Five: Let the Walls Dry Completely
Once you’ve finished washing, let your walls air dry fully before you rehang pictures or push furniture back into place. This usually takes an hour or two, depending on how humid your home is.
Open a window or turn on a fan to speed things along. Rushing this step can trap moisture behind frames or furniture, which sometimes leads to mold or mildew down the road.
Special Tips for Different Rooms
Kitchens need more frequent cleaning because of grease buildup from cooking. A monthly wipe-down keeps things from getting out of hand.
Bathrooms deal with steam and moisture, which can lead to mildew if you’re not careful. A vinegar and water solution works well here, and running the fan during and after showers helps prevent buildup in the first place.
Kids’ rooms and hallways see the most physical contact, from handprints to scuffs. These spaces benefit from semi-gloss or satin paint, since it holds up better to frequent cleaning than flat finishes do.
Common Mistakes to Avoid
A few small mistakes cause most of the wall-cleaning problems people run into. Scrubbing too hard is probably the biggest one. It feels like more pressure means a cleaner wall, but on flat and matte paint, it just wears down the finish and leaves shiny patches behind.
Skipping the test spot is another common slip-up. It only takes thirty seconds, and it can save you from an obvious stain or discoloration in the middle of your living room wall.
Using too much water is a third mistake. A soaked sponge sends water dripping down behind outlets and baseboards, which can lead to warped drywall or mold over time. Wring your sponge out well before it touches the wall.
Finally, mixing cleaning products is never a good idea. Combining bleach with ammonia-based cleaners creates dangerous fumes. Stick to one product at a time, and always work in a room with good airflow.
When to Consider Repainting Instead
Sometimes a wall has just seen too much. If you’ve cleaned it a few times and the color still looks faded, blotchy, or the paint is peeling, cleaning won’t fix that. At that point, a fresh coat of paint is your best bet.
A good rule of thumb is this: if cleaning starts to feel like more trouble than it’s worth, or if you notice the paint coming off as you wipe, it’s time to repaint rather than keep scrubbing.
Final Thoughts
Cleaning your walls isn’t glamorous, but it makes a bigger difference than most people expect. A clean wall brightens up a whole room, and it protects the work you already put into painting it. Dust first, use a gentle soap and water mix, work from the bottom up, and always test new cleaners before you go all in.
Do this a couple of times a year, and your walls will stay looking fresh for a long time, no repainting required.


Comments are closed.