Author

Henry Lucas

Browsing

Shopping for paint can feel overwhelming. You walk into a store, see rows of colorful cans, and wonder which one is right for your project.

If you’ve spotted Sherwin-Williams paint at Lowe’s, you might assume it’s identical to what you’d find at an actual Sherwin-Williams store.

But is it really the same? The short answer is no, and understanding why matters if you want your walls to look good and last.

This guide breaks down everything you need to know. You’ll learn what makes these paints different, where to buy them, and which one fits your project best.

What Is Sherwin-Williams Paint at Lowe’s?

Homeowner painting a wall using HGTV Home by Sherwin-Williams paint from Lowe’s.
A man paints a light blue bedroom wall with a roller, using Sherwin-Williams paint in soft, natural weekend lighting.

When you see Sherwin-Williams paint at Lowe’s, you’re looking at a special product line. It’s called HGTV Home by Sherwin-Williams, and it’s made specifically for Lowe’s customers.

Yes, the same company manufactures it. But the formula isn’t the same as what professional painters use from Sherwin-Williams stores.

Lowe’s paint is built for regular homeowners who want to tackle weekend projects. It’s meant to be simple, affordable, and easy to apply without needing special tools or training.

You can grab a can off the shelf, head home, and start painting without much fuss. That convenience comes with trade-offs, though.

The formula isn’t as strong as professional-grade paint. You might need an extra coat or two to get full coverage. It won’t hold up as well in rooms that see a lot of action, like kitchens or kids’ playrooms.

But for a guest bedroom or a single accent wall, it can work just fine. The price is lower, and you’re not paying for features you don’t really need.

What Do Sherwin-Williams Stores Sell?

Walk into a Sherwin-Williams store, and you’re entering a different world. These locations carry paint designed for serious projects and professional results.

The brands here have names like Emerald, Duration, and SuperPaint. These aren’t just fancy labels. They represent paint that’s engineered to perform better and last longer.

Professional painters prefer these products because they cover walls more completely. You might only need one or two coats instead of three or four.

The color stays true over time, even in rooms with lots of sunlight. Cleaning is easier too. Scuffs and marks wipe away without damaging the finish.

These paints handle moisture better, which matters in bathrooms and laundry rooms. They resist fading, peeling, and cracking for years.

If you’re painting a whole house or remodeling a busy space, this quality makes a real difference. You won’t need to repaint as often, which saves time and money down the road.

The downside? Higher upfront cost. You’re paying for better ingredients and technology. But if you’re in your home for the long haul, that investment usually pays off.

How the Formulas Are Different

Side-by-side comparison of Lowe’s HGTV Home paint versus Sherwin-Williams store paint finish quality.
Split-screen image comparing Lowe’s HGTV Home paint and Sherwin-Williams paint, highlighting smoother, richer color on the pro side.

The biggest difference between these paints is what’s actually inside the can. It’s not just marketing or packaging.

Lowe’s paint uses a formula that’s easier to work with but less concentrated. That means it spreads smoothly and dries quickly, which is great for beginners.

However, the pigments aren’t as dense. You’ll see the old wall color showing through after one coat. That’s normal, but it means more work.

Store-bought Sherwin-Williams paint has a thicker formula with more pigment packed into every gallon. One coat often does what two coats of Lowe’s paint would do.

The binders in professional paint also create a tougher surface. It stands up to scrubbing, bumps from furniture, and daily wear without losing its look.

Think of it like comparing a basic printer to a professional model. Both print, but one handles more jobs better and faster.

Where Coverage Really Matters

Coverage isn’t just about saving time. It affects how your room actually looks when you’re done.

Cheaper paint often leaves thin spots. You might notice streaks or uneven color when the light hits the wall a certain way. That’s frustrating after you’ve spent hours painting.

With better coverage, walls look smooth and consistent. The color appears richer and more true to the sample chip you picked out.

If you’re painting over a dark color or covering stains, strong coverage becomes even more important. Weak paint won’t hide those problems without multiple coats.

Professional-grade paint handles these challenges better. It’s made to cover difficult surfaces without showing through.

Durability You Can Actually See

Durability sounds like a boring technical term, but it’s something you’ll notice every day.

Paint in a hallway gets bumped by backpacks, shoes, and shopping bags. Kitchen walls deal with grease, steam, and constant cleaning.

Lower-grade paint starts looking worn after a year or two in these spaces. The color dulls, and scuff marks won’t come off no matter how gently you wipe them.

Higher-quality paint from Sherwin-Williams stores keeps looking fresh. The finish stays intact, and cleaning doesn’t damage it.

This matters most in homes with kids or pets. High-traffic areas need paint that can take a beating and still look decent.

For rooms you barely use, like a formal dining room or guest space, durability isn’t as critical. That’s where Lowe’s paint makes more sense.

Finish Choices and Why They Matter

Paint finish isn’t just about looks. It changes how the paint performs.

Flat or matte finishes hide wall imperfections but don’t clean well. Satin and eggshell finishes offer a slight sheen and handle cleaning better.

Semi-gloss and gloss finishes are the toughest but show every flaw in your walls.

Lowe’s carries basic finish options that work for most rooms. You’ll find what you need without getting overwhelmed by choices.

Sherwin-Williams stores stock a wider range. They have specialty finishes for bathrooms, kitchens, and even outdoor projects. Some finishes resist mold or repel stains better than standard options.

If you’re painting trim, cabinets, or doors, the finish selection at a Sherwin-Williams store gives you more control over the final result.

Price Comparison: What You Actually Pay

Let’s talk money. A gallon of HGTV Home paint at Lowe’s typically runs between $30 and $45, depending on sales.

Professional paint from Sherwin-Williams stores costs more, usually $50 to $80 per gallon. Some premium lines go even higher.

That looks like a big gap. But here’s the thing: you often need less paint from the store.

If Lowe’s paint requires three coats and store paint only needs two, you’re buying fewer gallons overall. The price difference shrinks when you do the math.

Plus, paint that lasts twice as long means you won’t repaint as soon. That saves money over time.

For a one-time project you won’t repeat, go with the cheaper option. For rooms you’ll live with for years, spending more upfront usually makes sense.

Sherwin Williams Near Me: Finding the Right Store

So where do you actually buy this paint? That depends on which version you want.

Lowe’s stores are everywhere. You can probably find one within 20 minutes of your house. They’re open evenings and weekends, which is convenient if you work during the day.

Finding a Sherwin-Williams store takes a bit more effort. They’re less common than big-box retailers.

To locate one, search online for “Sherwin Williams near me” or visit their website. Enter your zip code, and you’ll see all nearby locations with addresses and hours.

Some neighborhoods don’t have a Sherwin-Williams store at all. You might need to drive 30 minutes or more. That’s worth it for big projects but annoying for quick touch-ups.

Many Sherwin-Williams locations offer services Lowe’s doesn’t. Staff can match custom colors, mix special finishes, and give detailed advice based on your specific project.

They’ll also deliver large orders or hold products for you. If you’re painting multiple rooms, that help can save headaches.

Before you go, call ahead. Some stores keep different hours or close for holidays. You don’t want to drive across town for nothing.

If there’s no store nearby, check if they deliver to your area. Some Sherwin-Williams locations ship paint directly to your home for a fee.

When to Buy at Lowe’s

Comparison of Lowe’s and Sherwin-Williams store interiors showing different paint selections.
Two images side-by-side: a Lowe’s aisle and a Sherwin-Williams store, showcasing customers browsing paint samples.

Lowe’s paint works great in certain situations. Here’s when it makes the most sense.

You’re painting a small space, like a bathroom or closet. You don’t need premium quality for 50 square feet of wall.

The room doesn’t get much use. A home office or guest room won’t suffer from lower durability.

You’re on a tight budget and can’t spend extra right now. Getting paint on the walls is more important than perfection.

You want to try a bold color but aren’t sure you’ll keep it. Cheaper paint makes experimenting less risky.

You’re doing a temporary fix before moving or selling. The paint just needs to look decent for showings.

You’re a beginner and want something forgiving. Easier application helps you build confidence without wasting expensive paint.

When to Visit a Sherwin-Williams Store

Other projects call for better paint. Here’s when you should head to an actual Sherwin-Williams location.

You’re painting your whole house or multiple rooms. The extra quality becomes obvious across larger spaces.

The room sees heavy use every day. Living rooms, family rooms, and kitchens need tougher paint.

You’re investing in a renovation and want results that last. Don’t pair new cabinets or flooring with cheap paint.

You need special features like stain resistance or mold protection. Premium lines handle these needs better.

You’re painting over dark colors or covering damage. Strong coverage saves time and frustration.

You want a specific color matched perfectly. Store staff have better tools and expertise for custom mixing.

What Matters Most for Your Project

Every painting project is different. Before you buy, think about these questions.

How long will you live with this paint? If it’s five years or more, quality matters.

How much wear will the walls take? Be honest about your lifestyle.

What’s your total budget? Don’t just think per-gallon cost. Calculate how many gallons you’ll actually need.

Do you have time for multiple coats? Some projects need to happen fast.

How important is the exact color? If you’re matching existing rooms, precision counts.

Are you comfortable asking for help? Sherwin-Williams stores offer more guidance than a big-box retailer.

Your answers point you toward the right choice. There’s no wrong answer, just different priorities.

Making the Final Decision

Both options come from the same company, but they serve different purposes.

Lowe’s paint is affordable, accessible, and perfect for casual projects. It gets the job done without breaking the bank.

Sherwin-Williams store paint costs more but delivers professional results. It’s built for spaces you’ll use and see every day.

The key is matching the paint to your needs, not just grabbing the cheapest can with a familiar name.

Think about your space, your budget, and how long you want the paint to last. That clarity makes the choice much easier.

And remember: good prep work matters more than the paint brand. Clean walls, proper primer, and careful application make any paint look better.

Whether you shop at Lowe’s or a Sherwin-Williams store, you’re getting a solid product. The difference is whether it’s the right product for what you’re trying to do.

Take your time, ask questions, and pick the paint that fits your project. Your walls will thank you.

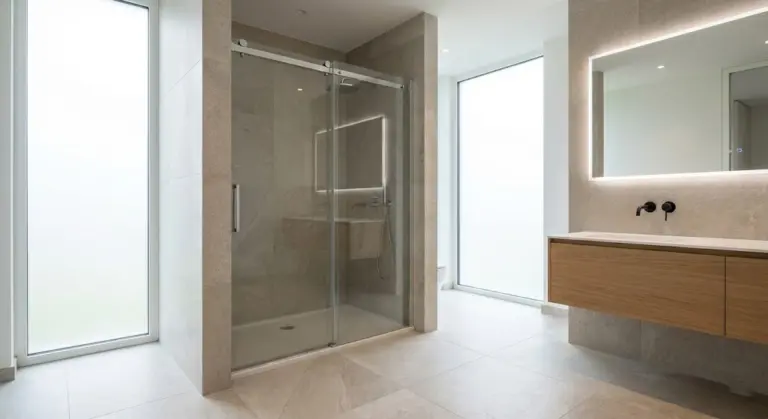
Upgrading your bathroom with a stylish shower door can completely change how your space looks and functions. The Black Delta Lyndall Mod Shower Door stands out as a top choice for homeowners wanting a modern, matte black finish paired with reliable performance.

This shower door features premium 10mm glass, Lyndall towel bar handles, and Spot Guard technology, making it both beautiful and practical. Whether you’re planning a full bathroom remodel or just replacing an old shower door, understanding what makes this product special helps you decide if it’s the right fit for your home.

Featured Snippet: The Delta Lyndall Mod Shower Door is a frameless sliding door system featuring minimal metal design, soft-close technology, and premium tempered glass panels available in 6mm or 10mm thickness. The matte black finish coordinates with modern bathroom fixtures, while Spot Guard coating resists water spots and buildup for easier cleaning.

What Makes the Delta Lyndall Mod Special

Close-up of a matte black metal handle on a glass door, showcasing a modern design with slim lines and minimal frame.
Detailed view of a black metal handle on a glass door, highlighting the sleek, modern design of the Delta Lyndall Mod system.

Design and Construction

The Mod track system features minimal metal and slim lines, creating a sleek appearance perfect for modern homes. Unlike traditional framed doors that use bulky aluminum around each panel, this semi-frameless design keeps things clean and open.

The Lyndall handle design deserves attention. These towel bar door handles offer uncomplicated design with bold geometric styling and provide extra hanging space. You get both form and function in one package.

Glass Options and Quality

Premium 10mm glass panels provide a luxurious feel and superior opening and closing experience. The thicker glass adds weight that feels substantial when you slide the door. All glass is ANSI-certified tempered safety glass.

You can choose from several glass types:

  • Clear glass for maximum openness
  • Frosted glass for privacy
  • Smoked glass for a tinted look
  • Rain glass for texture
  • Ingot glass for unique patterns

Soft-Close Technology

Illustration of a glass shower door with sleek black hardware, showcasing a soft-close mechanism and a shower head above.
A glass shower door with a handle and shower head, featuring a soft-close mechanism and elegant black hardware.

The Delta Soft Close System reduces rattling and slamming using an integrated damper system hidden within the track. The system is installed on both sides of the track for smooth gliding regardless of which panel you’re opening or closing.

This feature particularly helps households with kids who tend to slam doors. The gentle closing action prevents loud bangs and reduces wear on the door components.

Size Options and Fit Requirements

Available Dimensions

The Lyndall Mod system comes in multiple width configurations:

Width Range Walk-In Opening Height
43-3/8″ to 47-3/8″ 19″ to 23″ 71-1/2″
50-1/8″ to 58-1/2″ Variable 71-1/2″
60″ standard Variable 71-1/2″

The system requires minimum opening width starting at 43-3/8 inches up to maximum widths of 58-1/2 inches depending on the model.

Installation Requirements

Wall studs are required for both 6mm and 10mm Mod systems, positioned 1-1/2 inches from the front surface of the sill for proper support. This differs from Delta’s Traditional or Ashmore sliding doors which don’t need studs.

The Mod system can accommodate out-of-plumb conditions up to 3/8 inch. This adjustment capability helps if your shower walls aren’t perfectly level.

You’ll need minimum clearances:

  • Threshold depth: 2-3/4 inches
  • Sill to ceiling height: 74-1/4 inches minimum
  • Threshold to top of door: 71-3/8 inches

Matte Black Finish Maintenance

Hands cleaning a matte black shower door with a soft cloth, showcasing easy maintenance and spot resistance in a bathroom setting.
A person wipes a matte black shower door with a microfiber cloth, demonstrating simple cleaning techniques in a modern bathroom.

Daily Care

Matte black finishes require wiping down glass and hardware with a soft cloth and gentle cleaner, avoiding abrasive cleaners or tools that could harm the surface. A mix of water and vinegar works well for water spots.

Regular maintenance keeps your door looking sharp. Squeegee the glass after each shower to prevent water spots from forming.

What to Avoid

Since matte black finishes use powder coating or electroplating processes, stay away from chemicals, bleach, and wax-based cleaners to avoid marring the finish. Mild, soapy water is recommended for cleaning.

The manufacturer specifically warns against products containing certain harsh chemicals that can discolor the finish or reduce glass clarity over time.

Long-Term Durability

Powder-coated matte black trim may show fading over time, especially with less expensive options. The electroplating process offers higher quality and better durability, though it costs more.

Tracks are crafted from anodized aluminum for strength and corrosion resistance, which helps the door maintain its appearance for years.

Installation Process

Preparation Steps

Two capable adults should handle installation, as the glass size and dimensions can make placement challenging depending on environment and physical condition. Have a cushioned spot like carpet or blanket ready to rest panels and avoid contact with hard surfaces.

Check glass before installing – if chips, scratches, or other damage appear, don’t install it and contact Delta’s Customer Experience Team.

Installation Resources

Delta offers the BILT app for 3D installation instructions that guide you through the process step-by-step. The app provides interactive visual guides that make complex steps easier to understand.

Installation includes detailed step-by-step instructions and all mounting hardware. The top track and bottom track must be cut according to manual measurements for proper fit.

Common Installation Issues

If studs are missing or misaligned, stop installation and contact the Customer Experience Team. Trying to work around missing studs can create safety issues and void your warranty.

If the shower base isn’t level, the system won’t perform as it should. Check your shower floor for level before ordering to avoid problems later.

Spot Guard Technology

Delta’s exclusive Spot Guard technology resists water spots and unsightly buildup to make cleaning effortless. This proprietary coating goes on during manufacturing and faces the shower interior.

The hydrophobic treatment causes water to bead up and roll off instead of clinging to the glass. This reduces soap scum, limescale, and mineral deposit accumulation when properly maintained.

You’ll spend less time scrubbing and more time enjoying your shower. The coating doesn’t eliminate all cleaning needs, but it significantly reduces how often you need to deep clean the glass.

Price and Value

Cost Range

Based on Home Depot listings, expect to pay:

Configuration Glass Type Approximate Price
43-3/8″ to 47-3/8″ Clear $588-$693
50-1/8″ to 58-1/2″ Clear $588-$899
50-1/8″ to 58-1/2″ Frosted $615-$640
50-1/8″ to 58-1/2″ Smoked $624
50-1/8″ to 58-1/2″ Rain $616

Matte black finishes cost more than chrome or brushed nickel options, but prices have decreased as volume increased.

Warranty Coverage

Delta provides a 5-year limited warranty covering defects in material and workmanship. This coverage applies from the purchase date for original consumer purchasers.

The warranty doesn’t cover damage from improper installation, use of harsh chemicals, or normal wear and tear. Keep your receipt and follow maintenance guidelines to protect your coverage.

Comparing to Other Options

Mod vs Traditional Track

The Traditional style track offers hidden rollers and reversible design but lacks the soft-close feature. Traditional doors don’t require studs for installation, making them easier to install in some situations.

The Mod track’s semi-hidden rollers and minimal metal create a more contemporary appearance. If you want the cleanest look possible, Mod delivers better aesthetics.

6mm vs 10mm Glass

Standard 1/4-inch (6mm) glass provides adequate quality for most bathrooms. Premium 10mm glass panels offer a more luxurious feel and superior experience when opening and closing.

The thicker glass weighs more, which some people prefer for the substantial feel. It also tends to be slightly quieter when sliding. Budget affects this choice since 10mm options cost more.

Design Compatibility

Coordinating with Fixtures

The Lyndall handle collection extends beyond shower doors. You can find matching bathroom accessories, faucets, and shower heads in the same finish.

Matte black works well in mixed metal designs, coordinating nicely with brass or chrome for an eclectic feel. Don’t feel locked into all-black everything.

Style Considerations

Matte black finishes are bold and command attention. If you want focal points elsewhere in your bathroom, consider whether the dramatic hardware might compete for attention.

For fix-and-flip properties or homes you plan to sell soon, chrome or brushed nickel might be safer choices since they appeal to broader buyer preferences.

The modern, minimalist aesthetic suits contemporary and transitional bathroom styles particularly well. Traditional or vintage bathrooms might clash with the sleek black finish.

Customization Options

Delta’s 1-2-3 sliding shower door program offers over 175 combinations to create custom shower door experiences. You choose glass type, door track style, and handle design separately.

This flexibility lets you match your exact preferences and coordinate with existing bathroom elements. Pre-designed packages are also available if you’d rather not customize.

The color coding system (yellow for bathtub, green for shower, blue for pivoting) helps ensure you select compatible components when buying separately.

Maintenance Schedule

Weekly Tasks

  • Squeegee glass after each shower
  • Wipe down hardware with soft cloth
  • Check for loose screws or hardware

Monthly Tasks

  • Deep clean glass with approved cleaner
  • Inspect rollers for smooth operation
  • Check seals and gaskets for wear

Annual Tasks

  • Examine all hardware for corrosion
  • Test soft-close mechanism function
  • Inspect glass for chips or cracks

Following this schedule extends your door’s lifespan and maintains its appearance. Address small issues before they become big problems.

Troubleshooting Common Issues

Door Won’t Stay Closed

Check if the soft-close dampers need adjustment. Sometimes the door rolls open a few inches after closing, which usually indicates damper or roller issues.

Verify the shower floor is level. An uneven surface causes doors to drift open naturally.

Water Leakage

Inspect the bottom track seal and side seals. Replace worn gaskets promptly to prevent water damage to surrounding areas.

Make sure the door fully closes and latches properly. Gaps allow water to escape during showering.

Difficult Sliding

Clean the track and rollers regularly. Buildup of soap scum or hair can impede smooth operation.

Check roller adjustment. Rollers can be adjusted to guarantee leveled installation, which affects how smoothly doors slide.

Frequently Asked Questions

Can I install the Delta Lyndall Mod myself?

Yes, experienced DIYers can handle installation with proper tools and help. Two adults are recommended for handling the glass safely during installation. The BILT app provides step-by-step 3D instructions. However, professional installation ensures proper alignment and prevents issues.

How do I clean matte black shower door hardware?

Use a soft cloth with gentle cleaner and avoid abrasive tools. Mild, soapy water works best, while chemicals, bleach, and wax-based cleaners should be avoided. For water spots, try a water and vinegar mixture. Regular wiping prevents buildup and maintains the finish.

What’s the difference between 6mm and 10mm glass?

10mm glass panels provide a more luxurious feel with superior opening and closing experience. The thicker glass weighs more and feels more substantial. Both options are tempered safety glass meeting ANSI standards. Your choice depends on budget and desired feel.

Does the matte black finish scratch easily?

Finishes created through powder coating or electroplating are designed for durability, though quality varies. High-quality powder finishes resist fading, scratching, and peeling. Proper care using non-abrasive cleaners helps prevent scratches. The electroplating process offers higher quality and better scratch resistance than powder coating.

Looking at 2226 SE 11th Walla Walla WA? This Southeast neighborhood gem offers tree-lined streets, spacious yards, and genuine community connections. Properties range from 1,400-2,200 sq ft on 0.2-0.5 acre lots, with median prices around $425,000 in Washington’s premier wine country.

What Makes This Address Stand Out

When you start looking at homes around 2226 SE 11th Walla Walla WA, you’re checking out more than just another address in Washington. You’re considering a neighborhood where people actually know their neighbors, kids bike to parks without worry, and your Saturday might include farmers markets and vineyard visits within minutes of home.

Southeast Walla Walla delivers what buyers search for when they’re ready to settle down. You get safety without feeling isolated, space without the high costs of bigger Washington cities, and community without the congestion that makes daily life feel like a constant battle. Whether you’re buying your first place, upgrading for your growing family, or thinking about investment property, this area makes sense for people who want real value.

The properties here sit in one of those rare residential pockets where everything just clicks. Tree-lined streets give you that classic Washington charm, actual yard space means your kids and pets have room to play, and the downtown area stays close enough for coffee runs without the noise and traffic cutting through your peaceful evenings at home.

Understanding the Property Features

Mid-century and craftsman-style homes in Southeast Walla Walla showcasing large lots and mature landscaping.
Homes around SE 11th feature classic mid-century and craftsman architecture with generous lot sizes.

Most homes around this address were built between the 1950s and 1990s, which means you’ll see a mix of architectural styles that actually work for modern families. The mid-century ranch layouts and craftsman designs aren’t just pretty to look at—they’re practical spaces where life flows naturally from room to room without weird hallways or wasted square footage.

You’re typically looking at 3 to 4 bedrooms and 2 to 3 bathrooms in houses along SE 11th Avenue. Square footage usually lands between 1,400 and 2,200 depending on additions and layout choices that owners made over the decades. Many homes feature single-story ranch styles that work great for families with young kids or retirees who don’t want to deal with stairs every single day.

The lot sizes here really beat most newer developments by a wide margin. You get actual yard space measuring between 0.2 and 0.5 acres instead of just a patch of grass squeezed between fences. That means room for gardens, play areas, outdoor furniture, or whatever matters to your family without feeling cramped or constantly bumping into the neighbors every time you step outside.

Garages come standard with most properties, and many homes include basements that work perfectly for storage or potential conversion into living space down the road when your needs change. The mature trees and established landscaping give you that settled feel instead of the bare lots where you’re waiting years for shade and privacy to develop naturally.

Property taxes in Walla Walla County average around $1,600 to $2,000 annually for homes in this price range. That’s reasonable compared to other Washington markets where taxes can really strain your monthly budget and make homeownership feel less affordable than it should.

The Real Estate Market Right Now

Walla Walla County’s median home price sits at $425,000 as of mid-2025, and properties in Southeast Walla Walla typically fall within or slightly above that range depending on specific features and condition. The market conditions favor neither buyers nor sellers right now, which actually works in everyone’s favor because it means reasonable negotiation room exists for both sides.

Inventory remains limited compared to demand, so well-priced homes in desirable areas like SE 11th don’t stay on the market very long. Properties typically go pending within 15 days in Walla Walla according to current data, though homes in Southeast neighborhoods can move even faster when priced correctly and showing well to potential buyers.

Price per square foot averages about $215 in this neighborhood, though features like updated kitchens, new roofs, or finished basements push that number higher naturally. Recent sales on SE 11th Avenue show homes selling between $400,000 and $500,000 depending on size, condition, and lot features that matter to buyers making final decisions.

The appreciation trends look solid when you examine the data over time. Walla Walla home prices increased steadily over the past year, with different sources reporting various percentages depending on which properties they tracked. The overall growth remains positive without the wild swings that make homeownership feel like gambling instead of a stable investment in your future.

For people considering this address as an investment property, rental demand stays consistent throughout the year thanks to local employers, Whitman College bringing students to the area, and retirees choosing Walla Walla for the lifestyle and climate factors they care about. Mortgage rates have stayed relatively stable, making financing predictable for buyers who’ve done their homework and gotten pre-approved before house hunting begins.

Living in Southeast Walla Walla

Southeast Walla Walla offers that rare combination of small-town safety with modern conveniences sitting close by when you need them. Crime rates stay low compared to other parts of Walla Walla, which makes this area a top choice for families and retirees who prioritize security and peace of mind above almost everything else.

People here genuinely know each other in ways that feel increasingly rare in today’s world. You’ll see neighbors chatting over fences about weekend plans, kids playing outside without constant supervision, and genuine community connections that make daily life feel warmer and more supported. Local events actually draw crowds instead of empty promises, and the neighborhood watch participation stays active year-round.

The demographic mix includes young families starting out, working professionals who want space to breathe after long workdays, and retirees who appreciate the proximity to medical services and grocery stores without city congestion making every errand feel like a production. Everyone shares an appreciation for the lifestyle this area provides.

Walkability scores well throughout this neighborhood. You can reach Pioneer Park or Fort Walla Walla Park within minutes for weekend activities or evening strolls when you need to clear your head. Downtown sits close enough for quick trips without requiring long drives that eat up your time and patience.

Schools and Educational Options

Walla Walla Public Schools serves this area, with Sharpstein Elementary being one of the closest elementary options for families with young children. Students feed into Garrison Middle School and eventually attend Walla Walla High School as they progress through their educational journey. The district serves 5,599 students across 16 schools and maintains a strong focus on academic achievement.

Parents consistently rate the schools well for both education quality and the support systems in place for students who need extra help or challenge. Schools actively involve parents through volunteer programs, sports teams, and arts activities that bring families together beyond just drop-off and pickup times.

The educational environment matters not just for families with kids right now, but also for resale value when you eventually decide to move. Strong schools protect your investment and make your home more attractive to the next generation of buyers looking for the same quality education and community involvement.

Parks and Recreation Opportunities

Walla Walla maintains 15 public parks throughout the city, with several sitting within easy reach of Southeast neighborhoods. Pioneer Park offers playgrounds where kids can burn energy, sports fields for weekend games, and picnic areas perfect for summer gatherings with family and friends.

Fort Walla Walla Park combines history exhibits with green space and walking trails that work for exercise or just enjoying nature without driving far from home. The parks system gives families plenty of options for outdoor activities year-round instead of feeling stuck indoors or having to plan elaborate trips just to get outside.

Community events happen regularly at local parks throughout the seasons. Seasonal festivals, farmers markets, and downtown gatherings bring neighbors together and create those memories that make a house feel like home instead of just another address where you sleep at night.

Wine Country Lifestyle Benefits

Vineyards and rolling hills near Southeast Walla Walla showcasing the region’s wine country lifestyle.
Living near SE 11th means easy access to Walla Walla’s renowned wineries and scenic landscapes.

Living near 2226 SE 11th Walla Walla WA means you’re right in the heart of one of Washington’s premier wine regions. Over 120 wineries operate in the Walla Walla Valley, and many host events, live music performances, and food pairings throughout the year that turn ordinary weekends into special experiences.

Your typical Saturday might start with a farmers market run where you pick up fresh produce directly from local growers, continue with wine tasting at a nearby vineyard where you discover new favorites, and end with a farm-to-table dinner downtown that showcases local ingredients. The wine scene brings visitors year-round, which keeps restaurants and businesses thriving without overwhelming the small-town character that residents value.

Boutique shops and local restaurants line downtown streets offering everything from casual cafes to upscale dining experiences. The pace of life slows down compared to Seattle or Spokane, which appeals to remote workers, retirees, and families who want more time for what actually matters instead of spending hours stuck in traffic or dealing with city stress.

The Home Buying Process

Starting your home search with pre-approval for a mortgage makes the entire process smoother from day one. Sellers take pre-approved buyers seriously because they know you’re ready to move forward, and you’ll understand your exact budget before falling in love with a property that’s beyond your financial reach.

Working with a local real estate agent who’s familiar with Southeast Walla Walla gives you a huge advantage. Agents at firms like RE/MAX Walla Walla, Coldwell Banker, or Windermere Real Estate understand neighborhood nuances, pricing trends, and which properties offer real value versus inflated listings that sit on the market too long.

During showings, check these critical areas that can make or break your decision. Look at the foundation for cracks or settling issues that signal bigger problems, examine the roof condition and estimate how many years of life remain, test the plumbing quality and water pressure throughout the house, watch for signs of water damage or moisture problems in basements and crawl spaces, and check the HVAC system age and functionality.

Hiring a professional inspector before finalizing any offer protects you from costly surprises after closing. Inspections reveal hidden issues with electrical systems, structural integrity, and mechanical systems that affect your negotiation position or might become deal breakers you need to know about upfront.

Budget for closing costs that typically run 2% to 5% of the purchase price. These include title insurance that protects your ownership, appraisal fees that confirm the property’s value, attorney costs for legal review, and escrow charges that many buyers forget when calculating their total investment required at closing.

Making Your Offer Stand Out

Submit competitive offers based on current market data from recent sales instead of wishful thinking about getting a steal. Include a personal letter explaining why this home fits your needs and what you love about the property. Sellers often choose offers from buyers who connect emotionally with their home over slightly higher bids from investors who just see numbers.

Limit contingencies when possible to make your offer cleaner and easier for sellers to accept. Offers with fewer conditions close faster and create less stress, giving you an edge over complicated bids requiring multiple approvals and timeline extensions that worry sellers.

Show financial strength through substantial earnest money deposits that signal serious intent. Larger deposits reduce seller concerns about deals falling through because of buyer cold feet or last-minute financing issues that waste everyone’s time and money.

Why Different Buyers Choose This Area

Families appreciate the safety factors, strong schools, and community connections that make raising kids feel manageable instead of overwhelming. Parks within walking distance, quality educational programs, and engaged neighbors create support networks that ease parenting challenges when you need help or advice.

Remote workers benefit from affordable housing compared to coastal Washington cities while maintaining quality internet access that’s reliable for video calls and cloud-based work. The peaceful environment helps you focus during work hours without city distractions or noise that interrupts your productivity and concentration.

Retirees find that the slower pace, excellent medical access at Providence St. Mary Medical Center, and cultural amenities like wine tasting offer a fulfilling daily life without big-city stress. The climate stays milder than western Washington with less rain and more sunshine year-round, which matters for people who want to actually enjoy their retirement years.

Investors recognize steady appreciation rates, consistent rental demand from local employers and Whitman College students, and lower entry costs compared to Seattle or Portland markets. First-time buyers gain access to homeownership without stretching budgets to breaking points, getting actual houses with yards instead of overpriced condos in dense developments.

Investment Potential to Consider

Walla Walla’s real estate market offers solid investment potential based on several factors working in your favor. The city’s growing reputation as a desirable small city in Washington drives consistent demand from people looking to escape bigger urban areas without sacrificing modern amenities.

Limited inventory relative to buyer interest supports stable prices that protect your investment over time. Rental rates in Walla Walla average $1,400 to $1,800 monthly for 3-bedroom homes in good condition, which provides reasonable returns when compared to purchase prices in this range.

Southeast Walla Walla specifically offers advantages for investors beyond just the numbers. The neighborhood’s reputation for safety and quality schools means consistent demand from quality tenants who take care of properties and pay rent on time. Properties here maintain value better than areas with higher crime rates or weaker schools during market downturns.

Planning Your Next Steps

Contact local real estate agents who specialize in Southeast Walla Walla properties to get current listing details and access to comparable sales data that helps you make informed decisions. Schedule property tours to experience the neighborhood firsthand because photos only tell part of the story when making major purchase decisions.

Get your finances organized early in the process since pre-approval speeds up the buying process and strengthens your negotiating position. Research property records through Walla Walla County resources to verify ownership history, tax assessments, and any liens or issues affecting the title before you commit.

Walking the streets around 2226 SE 11th Walla Walla WA gives you a real feel for the community vibe that matters just as much as the house itself. Check distances to parks and schools that you’ll use regularly, notice how neighbors interact, and imagine your daily routine in this setting.

Making Your Dream Home a Reality

Southeast Walla Walla offers that rare combination of safety, community connection, and investment potential that smart buyers recognize immediately when they visit. The properties around 2226 SE 11th Walla Walla WA represent more than just houses—they’re opportunities to build the lifestyle you’ve been working toward.

Whether you’re starting your home buying journey or ready to make an offer, taking action now puts you closer to owning a piece of this desirable Washington neighborhood. Your dream home might be waiting at this address or nearby, ready to welcome you into the community and lifestyle that makes Walla Walla special.

The blend of wine country culture, outdoor recreation, strong schools, and genuine neighbors creates something unique that’s hard to find elsewhere. Properties in this area hold their value, appreciate steadily, and provide that quality of life that money can’t buy but smart real estate choices can deliver.

The Timberlake Raised Garden Bed with Green House combines a 71.3-gallon galvanized planter with a removable greenhouse cover, featuring zippered vents for ventilation and easy access. This 2-in-1 system extends your growing season by 4-6 weeks while protecting plants from frost, wind, and pests.

What Makes This Garden System Special

If you’ve been dreaming about fresh vegetables on your patio but worried about space or seasonal limits, the Timberlake Raised Garden Bed with Green House in Green might be exactly what you need. This isn’t your typical garden box. It combines a sturdy raised bed with an attached mini greenhouse, giving you a complete growing solution in one package.

The system works like this: you get a galvanized steel planter bed measuring 4 feet long by 3 feet wide and about 1 foot high. On top sits a removable greenhouse cover that protects your plants while letting sunlight through. Think of it as creating your own personal microclimate right in your backyard. The whole setup holds approximately 71.3 gallons of soil, which is plenty of room to grow a real variety of plants.

What sets this product apart from basic raised beds is the greenhouse component included right from the start. You don’t need to buy a separate cover or build anything complicated. Everything you need comes in the box, and most people can have it assembled and ready to plant in less than an hour.

Understanding the Construction and Materials

Close-up of galvanized steel frame and UV-resistant polyethylene greenhouse cover with zippered vents.
Durable galvanized steel and UV-resistant cover ensure long-lasting protection for plants in all seasons.

The frame is where durability really shines. Timberlake uses galvanized steel with a rust-resistant coating and applies a green powder-coated finish that blends beautifully into any outdoor setting. This isn’t flimsy metal that will degrade after a season or two. The galvanizing process electroplates the steel, which means it can handle rain, snow, UV rays, and temperature changes year after year without developing rust spots.

The greenhouse cover is made from UV-resistant polyethylene, a lightweight material that’s tougher than it sounds. This covering allows sunlight to penetrate for your plants to grow properly while also retaining heat and moisture inside. It’s waterproof and won’t crack or become brittle from sun exposure like some lower-quality materials do.

The bed features an open-bottom design, which might sound strange at first. Here’s why it matters: water drains naturally through the bottom instead of pooling around your plant roots. This prevents root rot and keeps your soil from becoming waterlogged. The open bottom also lets beneficial soil organisms move naturally between your garden bed and the earth below.

All the edges are rolled and smooth, so you won’t get cut while assembling or reaching into your garden. The whole structure is relatively lightweight—under 50 pounds when empty—which means you can reposition it if you need to chase the sun or prefer a different spot in your yard.

Assembly Is Truly Straightforward

You won’t need fancy tools or special skills to get this running. Most people grab a screwdriver and wrench, and they’re good to go. The kit arrives flat-packed with clear, easy-to-follow instructions. You’ll start by connecting the steel panels to form your bed frame, then secure them with bolts using plastic connectors. After that, you attach the greenhouse frame and drape the cover over top.

The process takes under an hour for most people, even if you’ve never done this sort of thing before. If you have mobility issues or just don’t want to spend your Saturday afternoon wrestling with complicated instructions, this system respects your time. The elevated height of about 30-36 inches with the greenhouse attached means no bending down to your knees to plant and harvest, which is a huge relief for anyone with back problems or arthritis.

Once you’ve got it assembled, fill the bed with quality soil mix. A good blend combines topsoil, compost, and perlite to create the perfect balance of nutrients and drainage. Make sure your bed sits on relatively level ground so water flows evenly. Position it in a spot that gets 6 to 8 hours of direct sunlight daily, and orient those zippered vents away from strong prevailing winds if possible.

How the Greenhouse Cover Works

Gardener opening the greenhouse cover of a raised garden bed to control temperature.
The zippered vents let you control airflow and temperature — protecting plants from frost and overheating.

The removable greenhouse isn’t just a nice add-on. It’s genuinely functional and creates real benefits for your plants. The cover features two large zippered windows, which gives you flexibility. On hot days, you can unzip them to let hot air escape and prevent your plants from cooking. On cool mornings and evenings, you zip them up to trap warmth around your plants.

This temperature control extends your growing season significantly. In many regions, you can plant 4 to 6 weeks earlier in spring and keep growing 4 to 6 weeks later into fall. That dramatically increases how much you can harvest in a year. The cover also acts as a barrier against insects, birds, and small animals that would otherwise feast on your vegetables and flowers.

During peak summer heat, you can remove the cover entirely and use the bed as a standard raised garden box. This flexibility means one product works for you year-round without needing separate equipment. The cover stores compactly when not in use, so it won’t clutter your shed or garage.

What You Can Actually Grow

Various vegetables and herbs thriving in an open Timberlake Raised Garden Bed after greenhouse cover removal.
Grow everything from leafy greens to herbs and flowers — all in one compact, efficient garden system.

The versatility of this system is one of its biggest strengths. Vegetables love it here—tomatoes, peppers, lettuce, spinach, carrots, and cucumbers all thrive. Herbs like basil, parsley, mint, and rosemary flourish in the controlled environment. If you want color, plant flowers such as marigolds, petunias, and pansies. You can even grow strawberries or dwarf fruit varieties if you want to push beyond the typical vegetable garden.

For beginners, start with easier plants like lettuce and spinach to build confidence. As you get comfortable, expand to more demanding crops like tomatoes and peppers. The raised bed and greenhouse make these plants easier to manage than traditional ground-level gardens because you control the soil quality completely instead of dealing with whatever native soil exists in your yard.

In cooler seasons, switch to cold-tolerant crops like kale, radishes, or carrots. The greenhouse protection means you’re not limited to one growing season. Rotate your crops regularly to prevent diseases and keep your soil balanced. Plant companion plants together too—marigolds alongside tomatoes help deter pests naturally.

Real Benefits for Real Gardeners

The practical advantages add up quickly. An elevated bed means better drainage and soil aeration than ground-level gardens, which leads to healthier roots and higher yields. You’re not fighting constant weed battles because fewer weed seeds make it up into the raised bed. Any weeds that do appear are much easier to pull from the elevated height.

Pest control improves dramatically with the greenhouse cover. Instead of spraying chemicals that concern you, the cover creates a physical barrier that keeps most insects, birds, and animals out. Your plants get stronger because they’re not constantly stressed by pests trying to eat them.

The space-efficiency is perfect for urban dwellers or anyone with a small yard. This system maximizes what you can grow in a compact footprint. The aesthetic green finish means it looks intentional and attractive, not like you’ve crammed a utilitarian eyesore into your garden space. That matters when you’re looking at it from your kitchen window.

From a health perspective, you get physical activity without strain. Gardening becomes something you enjoy rather than something that leaves you sore. Environmentally, this supports sustainable practices. You’re growing your own food instead of buying produce shipped long distances. You can compost plant waste and practice water conservation through efficient drip irrigation if you want.

Maintenance Keeps Things Simple

This system doesn’t demand constant attention. Periodically check that bolts haven’t loosened over time. Clean the greenhouse cover with mild soap and water occasionally to remove algae buildup—this keeps light penetration clear. If you notice any areas where the protective coating has worn thin, a quick reapplication of sealant maintains the rust-resistant properties.

Inside the bed, monitor soil moisture with a simple finger test. Stick your finger about an inch into the soil. If it feels dry, water. If it’s still moist, wait. On hot days, check the greenhouse vents to make sure they’re open enough to prevent excessive condensation buildup. This prevents fungal issues that thrive in overly humid conditions.

Every few weeks, add balanced fertilizer to keep your plants nourished throughout the season. This varies by what you’re growing, but generally every 4 to 6 weeks is a good routine. Prune plants regularly to encourage airflow, which prevents disease.

Why Gardeners Choose This

The overwhelming feedback from people using the Timberlake system is positive. Users consistently mention how sturdy it feels, how straightforward assembly was, and how much they enjoy having a dedicated gardening space. It scores around 4.5 stars across most platforms where people review garden products. People appreciate that it’s genuinely beginner-friendly without sacrificing quality.

Whether you’re completely new to gardening or an experienced grower who just needs a compact solution, this system delivers. It removes barriers to growing your own food. You don’t need a huge yard. You don’t need perfect soil conditions. You don’t need extensive gardening knowledge. What you get is a reliable, well-made system that lets you grow fresh vegetables, herbs, and flowers in your space, on your terms, throughout more of the year than you’d expect.

The Timberlake Raised Garden Bed with Green House in Green is more than just a planter box. It’s a practical tool that makes gardening accessible, productive, and genuinely enjoyable. Start your growing journey today.

A kimona pole hanger metal hook is a durable, specially designed garment holder combining a sturdy metal hook with supportive pole structure. Originally developed for Japanese kimonos, these hangers now serve multiple purposes—protecting delicate fabrics, handling heavy coats, and organizing retail displays while resisting rust and lasting years.

Keeping your clothes organized shouldn’t be complicated. Whether you own delicate kimonos, heavy coats, or just want a better way to store your wardrobe, the right hanger makes all the difference. The kimona pole hanger metal hook offers a simple yet powerful solution that works for home closets and retail spaces alike. Let me show you why this particular hanger has become the go-to choice for people who care about preserving their clothing.

Understanding What a Kimona Pole Hanger Metal Hook Actually Is

Close-up of a kimona pole hanger metal hook holding a silk garment.
The sturdy metal hook and supportive pole design prevent creases and preserve fabric shape.

A kimona pole hanger metal hook is a specially designed garment holder that combines a sturdy metal hook with a supportive pole structure. Think of it as the stronger, more reliable cousin of standard plastic hangers. The metal construction means it won’t bend or break under the weight of heavier items. The pole design creates extra support that keeps garments in their proper shape without wrinkles or creases forming.

These hangers work particularly well for kimonos because they were originally designed with Japanese clothing in mind. Kimonos have unique shapes and weights that regular hangers simply can’t handle. The metal hook securely grips your garment while the pole below prevents any twisting or sliding. But here’s the thing—they work just as well for robes, jackets, coats, and other specialty garments that deserve better treatment than what a basic hanger provides.

Where the Kimona Pole Hanger Came From

The story of this hanger is rooted in Japanese tradition. Centuries ago, people who owned kimonos faced a real problem. These gorgeous garments with their delicate fabrics and intricate designs needed protection. Standard storage methods damaged them. So Japanese craftspeople developed specialized wooden hangers designed specifically for kimono shape and weight.

Over generations, the design improved. Wood gave way to more durable materials. Metal entered the picture because it offered strength that wood couldn’t match. Modern metalhangers now combine the wisdom of traditional design with contemporary materials and engineering. Today’s versions use stainless steel or aluminum—materials that resist rust and corrosion while remaining lightweight enough to use daily.

What’s remarkable is that this ancient solution remains relevant today. We’re not just preserving traditions for tradition’s sake. The kimona pole hanger actually solves real problems that modern wardrobes face.

Why These Hangers Stand Out From Everything Else

When you invest in a kimona pole hanger metal hook, you get several advantages that other hangers simply can’t match. Let me break down why they’re worth considering for your space.

Durability ranks at the top of the list. Metal hangers last for years without bending, cracking, or warping. Plastic hangers break under pressure. Wood hangers eventually warp from humidity. Metal stays true. Many come with rust-resistant coatings, which means they handle humid laundry rooms, bathrooms, and damp climates without deteriorating. You could pass your metal hanger down to someone else and it would still work perfectly.

The versatility factor deserves attention too. Yes, these hangers originally served kimonos, but they handle way more than that. Heavy winter coats? Perfect. Formal dresses? Absolutely. Scarves, shawls, and delicate items? They won’t slip. The strong metal hook grips securely while the pole provides stability. This makes them ideal for anyone with clothing that regular hangers struggle with.

Space matters in any closet. The compact design of a kimona pole hanger means you fit more items into the same amount of space compared to bulky plastic hangers. This becomes especially important if you live in an apartment, work in retail, or manage a boutique where square footage costs money.

Your actual clothing stays in better condition when you use these hangers. The metal hook and pole combination prevents creases that form when heavy garments bend plastic hangers. Fabric doesn’t stretch out of shape the way it does on flimsy hangers. Delicate materials stay protected rather than getting damaged or distressed.

Different Types and Styles You Can Choose

Various types of kimona pole hanger metal hooks in different styles and finishes.
From simple to sophisticated, kimona pole hangers come in multiple styles for every need.

One-size-fits-all doesn’t apply to garment hangers. Different situations call for different designs. Let me walk you through the main options available.

Standard metal hooks represent the basic model. These feature a straightforward design—a metal hook connected to a pole. They’re functional, durable, and perfect if you want no-nonsense storage. They come in various metallic finishes that work in any closet without standing out or looking out of place.

Rotating hook designs add extra convenience. These allow you to spin or adjust the hook position, making it easier to hang and remove garments. This feature proves especially helpful if your closet space is tight or if you frequently change what you’re hanging.

Padded hangers take protection to the next level. The shoulder area features soft padding that prevents delicate fabrics from getting creased or marked. This design works beautifully for expensive designer pieces or heirloom garments that you want to preserve perfectly.

Heavy-duty versions exist for serious weight. If you own thick winter coats, heavy robes, or specialty garments that weigh more than average, a heavy-duty metal hanger ensures everything stays safely supported. These won’t bend or flex under significant weight.

Child-sized hangers fit smaller clothing perfectly. Parents appreciate having appropriately sized hangers that work with kids’ clothes without wasting space or causing items to slip.

Decorative options combine function with style. Some metal hangers come in vibrant colors or special finishes that look attractive when garments are on display. Retail stores use these to create eye-catching presentations that draw customer attention.

Many manufacturers offer customization. You can request specific colors, special finishes, or even branded versions with your business logo. This becomes valuable if you run a boutique, hotel, or any business where presentation matters.

How to Pick the Right Hanger for What You Need

Making the right choice starts with honest assessment of your situation. Ask yourself what you’ll actually hang on this hanger. Will it be heavy winter coats or lightweight silk dresses? Indoor closet storage or outdoor display? Home use or commercial application? Your answers shape which features matter most.

Material quality impacts longevity directly. Look specifically for stainless steel or aluminum construction. These metals resist rust and corrosion better than regular steel. Check if the hanger has protective coatings that extend its life further. Reading customer reviews helps here—people will mention if their hanger started rusting after a few months.

Weight capacity determines what you can safely hang. Most quality metal pole hangers support between 20 and 30 pounds. Think about your heaviest item. Will the hanger handle it comfortably? Check the specifications before ordering, especially if you plan to hang multiple garments simultaneously.

Your budget requires realistic consideration. Metal hangers cost more than plastic alternatives, but they last longer and work better. Think about it as cost per year of use rather than initial price. A hanger that lasts 10 years costs far less per year than one that breaks after 12 months.

Space compatibility matters when you’re working with existing systems. Measure your closet pole diameter to ensure the hanger hooks fit properly. Consider whether you have enough vertical space for the hanger plus your tallest garments. These practical details prevent disappointment when your purchase arrives.

Creative Ways to Use Metal Pole Hangers Beyond Standard Storage

Your imagination determines how useful these hangers become. Most people think only of closet storage, but that’s just the beginning.

In entryways, a metal pole hanger creates functional organization for coats, hats, and daily accessories. It keeps things tidy while remaining visible and accessible. Guests see an organized, stylish space rather than clutter.

Laundry rooms become more efficient with proper hanging space. Air-dry clothes safely on sturdy metal hangers instead of draping them over shower rods or chairs where they wrinkle and take forever to dry.

Retail displays shine with these hangers. Boutiques, department stores, and specialty shops use them to showcase merchandise beautifully. The clean aesthetic draws customer attention while the durability handles constant use.

Events and exhibitions benefit from portable display solutions. Fashion shows, cultural exhibits, and trade shows all rely on quality hangers that set up quickly and handle professional use.

Home décor enthusiasts use them to display vintage kimonos or other textile art pieces as wall features. The functional design becomes part of the aesthetic rather than hidden away.

Artists and designers sometimes repurpose these hangers for other textile projects. Quilters, weavers, and textile artists appreciate the sturdy support for their work.

Conclusion: Making Your Storage Situation Seriously Better

The kimona pole hanger metal hook solves real problems that you face with regular hangers. Your clothes get better protection. Your closet stays more organized. Your storage system lasts longer. Whether you manage a home closet, run a retail business, or preserve heirloom garments, the right hanger makes a measurable difference.

The best time to upgrade your hanger situation is now. Quality metal hangers work harder and last longer than whatever you’re probably using currently. Your wardrobe deserves that investment. Your space will thank you for the improved organization. Start with one and experience the difference—then you’ll want to upgrade the rest.

HMS Photovoltaik combines traditional shipbuilding with solar technology to create vessels with dramatically reduced emissions. These hybrid ships use photovoltaic panels, batteries, and smart energy systems to power ocean voyages cleanly. Perfect for ferries, research vessels, and short-sea cargo ships.

Solar-powered hybrid ship using photovoltaic panels for clean ocean travel.
HMS Photovoltaik combines traditional shipbuilding with advanced solar technology to reduce emissions at sea.

What Is HMS Photovoltaik?

Imagine a ship that powers itself using the sun. That’s essentially what HMS Photovoltaik represents—a modern way of building ships that treats solar energy as a primary power source rather than an afterthought. The name sounds like a blend of naval tradition and clean energy passion, and it is exactly that.

HMS Photovoltaik isn’t simply about attaching solar panels to a ship’s deck. Instead, it completely rethinks how a vessel is designed from the ground up. Engineers redesign the hull shape, reconsider how energy gets stored, rethink propulsion systems, and reimagine onboard systems to squeeze every bit of value from sunlight at sea. The result is a ship that can run quietly on renewable energy for hours, produces dramatically fewer emissions, and operates with a much smaller environmental footprint than traditional vessels.

These ships combine solar-electric propulsion with highly efficient batteries, smart energy management systems, and hybrid drive systems that let captains sail silently when conditions allow. Some vessels pair solar with backup diesel engines for cloudy days or rough seas. Others combine solar with hydrogen fuel cells for even cleaner operations.

The Technology Behind Solar Ships

Diagram of HMS Photovoltaik system showing solar panels, batteries, and hybrid propulsion.
Modern Photovoltaik vessels integrate solar panels, batteries, and smart power systems for efficient clean energy use.

Modern Photovoltaik vessels use several layers of technology working together. The foundation starts with large-area solar integration. Ships use as much flat and curved surface area as safety and cargo space allow—decks, superstructures, even retractable sails or wing-like array structures. Flexible solar panels bend to fit curved surfaces, while rigid panels mount where weight distribution permits.

Energy storage becomes critical because the sun doesn’t shine all night. Advanced lithium-ion batteries or next-generation solid-state battery banks store power for propulsion and hotel loads like lighting, heating, cooling, and navigation systems. Smart energy-management systems act like a ship’s brain, constantly deciding when to use solar power directly, when to discharge batteries, and when to run auxiliary generators. This intelligent allocation keeps everything running smoothly regardless of weather or time of day.

The hull design itself becomes more efficient. Low-resistance hull shapes cut through water with less drag. Optimized propulsors—including electric pod drives or waterjets—demand less power than traditional systems. When a ship needs less power to move, solar can cover more of its energy needs.

Power electronics handle the heavy lifting of converting and distributing energy. Inverters transform stored energy from direct current to alternating current. Converters step voltage up or down as needed. The energy management system orchestrates everything. Advanced software can even predict weather patterns and optimize routes to maximize solar generation or reduce reliance on backup fuel.

How Ships Maximize Solar Capture

Marine-grade solar panels differ from rooftop panels on homes. They’re built to withstand salt spray, intense vibration, and constant UV exposure. Anti-reflective coatings help them capture more sunlight even when the sun sits low on the horizon. Mounting systems need to be robust enough to survive storms while remaining flexible enough to accommodate ship movement.

Temperature control matters more at sea than on land. Battery banks sit in climate-controlled compartments because extreme cold or heat reduces their efficiency and lifespan. Thermal management systems actively cool batteries during heavy discharge and warm them during winter sailings. This attention to detail extends battery life and ensures reliable power when needed most.

Some Photovoltaik designs get creative about energy harvesting. Regenerative braking systems capture energy as the ship slows down, similar to how hybrid cars recover energy when braking. Some vessels add retractable sails or wind rotors to catch breezes when the sun hides behind clouds. This multi-modal renewable approach means the ship harvests energy from multiple sources simultaneously.

Predictive software represents another innovation layer. These systems analyze weather forecasts, solar radiation predictions, and cargo schedules to optimize every voyage. The software might suggest adjusting speed slightly to extend range or rerouting to chase clearer skies. It sounds like science fiction, but these algorithms are already working on some modern vessels.

Why Photovoltaik Ships Make Sense Today

Photovoltaik vessels shine brightest in specific roles. Ferries running daily routes between the same two ports represent ideal candidates. A ferry travels in daylight, returns at night, and charges overnight at the dock. The predictable schedule means operators can plan for solar’s strengths and work around its limitations. Several modern ferries already use substantial solar arrays to supplement diesel engines.

Research and survey vessels benefit tremendously from solar-electric propulsion. Scientists need quiet operations to study marine life without disturbance. Electric motors running on solar power stay nearly silent compared to diesel engines. Researchers can spend more time collecting data and less time disturbing the creatures they’re studying.

Harbor workboats and pilot boats work within small areas and spend significant time idling at docks. Solar systems keep these vessels charged and ready while reducing fuel costs dramatically. Some luxury yachts and leisure craft are adopting Photovoltaik designs because owners value silent, clean cruising and the environmental benefits align with their values.

Short-sea cargo vessels moving goods between nearby ports can operate successfully on solar-hybrid power. When a ship only travels 200 kilometers in a day and returns to port nightly, solar can realistically cover a meaningful portion of energy needs. These vessels might use solar for 40 to 60 percent of their propulsion energy during daylight hours.

Real-World Examples and Current Progress

Real-world solar-powered cargo ship with photovoltaic panels docked at port.
Ships like the Blue Marlin and Helios prove that large-scale solar-powered vessels are already operating successfully.

Several real-world projects prove this technology works. The Blue Marlin, an inland cargo vessel, launched in Germany with 192 solar panels generating up to 37,500 kilowatt hours annually. This ship can carry 3,110 tonnes of cargo along canal networks in northwest Germany. Its solar system connects directly to high-voltage electric propulsion, advancing beyond older systems that only powered auxiliary loads.

Another vessel called Helios set records with 312 solar panels generating 90 megawatt hours of electricity per year. Guinness Book of Records recognized it as the largest solar-power system of its kind on a ship. This cargo vessel uses its solar harvest to power onboard systems, and in certain conditions—traveling lightly loaded downstream—it can operate on solar power alone for extended periods.

These aren’t fantasy concepts or distant future technology. They’re working ships moving real cargo and real people right now. Engineers and shipbuilders continue refining these designs, making solar systems more efficient and more affordable with each new vessel.

The Environmental and Economic Benefits

Photovoltaik ships deliver tangible environmental gains. Coastal shipping, ferries, and harbor workboats generate significant air pollution in port cities. Switching these vessels to solar-hybrid power cuts nitrogen oxides, sulfur oxides, and particulate matter—the pollutants that cause respiratory problems in port communities. Even partial electrification of the maritime fleet reduces overall emissions dramatically.

The economic case strengthens with each passing year. Although initial capital costs for solar panels, batteries, and power electronics remain substantial, lifecycle economics favor solar. After the upfront investment, operating costs drop significantly. Ships using solar power no longer face volatile bunker fuel prices that swing with global markets. A vessel using less fuel costs less to operate, period.

Many ports now offer financial incentives for low-emissions vessels. Green financing programs provide favorable loan rates. Some ports charge reduced docking fees for ships meeting environmental standards. Carbon pricing in some regions increases the cost of traditional fuel, making solar’s advantages even more compelling. These economic forces push ship owners toward Photovoltaik designs naturally.

Challenges Ships Must Overcome

Solar-powered shipping isn’t a silver bullet. Several real obstacles remain. Space constraints limit solar panel area. Cargo hold requirements, safety equipment, crew accommodations, and international maritime regulations all compete for deck space. A cargo ship can’t sacrifice hold capacity just to add panels, so designers must find creative compromises.

Energy density remains the fundamental challenge. The sun delivers about 1,000 watts per square meter on a clear day at sea level, but ships cover only so much area. For long-range heavy cargo transport across oceans, solar alone cannot compete with diesel fuel’s energy density today. A container ship moving 20,000 containers across the Pacific needs tremendous power, and solar alone cannot provide it economically.

Capital costs still challenge ship owners. Advanced photovoltaic systems, high-capacity battery banks, and integration engineering cost significantly more than conventional diesel systems. Return on investment timelines matter to shipping companies operating on thin profit margins. As technology matures and costs drop, this barrier weakens, but it remains significant for now.

The marine environment itself is harsh. Salt spray corrodes unprotected materials. Storms put extreme stress on mounted equipment. Biological fouling—when organisms grow on panel surfaces—reduces efficiency. Maintaining these systems demands robust materials, regular inspection, and cleaning protocols that add operational complexity.

The Path Forward: What Comes Next

HMS Photovoltaik represents both a concept and a stepping stone toward cleaner maritime transport. Industry adoption will likely follow a predictable path. First come small vessels and ferries—these are proving grounds where technology works and economics align. Then come retrofit projects on existing ships, adding solar systems to vessels mid-career. Finally, larger vessels will integrate solar with hydrogen or ammonia fuel systems for transoceanic voyages.

Technology advancement accelerates adoption curves. Solar panel efficiency improves steadily each year. Next-generation battery technologies promise higher energy density and faster charging. Marine-specific innovations address saltwater corrosion and operational reliability. Energy forecasting software becomes smarter and more available. Each advancement expands the cases where Photovoltaik designs make sense.

Regulatory pressure points in one direction only. International maritime organizations increasingly restrict emissions. Port authorities enforce stricter air quality standards. Carbon pricing mechanisms make low-emission ships economically superior to high-emission vessels. These regulatory forces don’t reverse—they only strengthen over time. Shipping companies recognizing this trend position themselves ahead of competitors by investing in Photovoltaik technology today.

The investment community notices. Banks and investors increasingly support green maritime technology with favorable financing. Insurance companies offer better rates for vessels with lower environmental impact. Supply chains improve and costs drop as manufacturing scales. What seems experimental and expensive today becomes mainstream and affordable within a decade.

The Bigger Picture: Why Maritime Shipping Matters

Shipping moves roughly 90 percent of global trade. The industry employs millions of workers and generates trillions in economic value. Yet maritime shipping also produces significant environmental impact. Large cargo ships emit massive quantities of greenhouse gases and air pollutants. If shipping were a country, its emissions would rank among the top countries globally.

Transforming maritime transport to cleaner technologies creates outsized environmental benefits. Switching even 20 percent of coastal and short-sea vessels to Photovoltaik designs would prevent billions of tons of carbon emissions over coming decades. The air quality improvements in port cities would reduce respiratory diseases, extend lives, and reduce healthcare costs.

Beyond environment and health, maritime transformation signals broader change. It shows that clean technology can solve real transportation challenges. It demonstrates that environmental responsibility and economic sense can align. It proves that innovation addressing climate change creates better, more efficient systems—not sacrifices.

HMS Photovoltaik isn’t just about ships. It’s about recognizing that the future moves toward cleaner energy across all transportation modes. Ocean-going vessels powered by the sun represent one version of that future. Each completed Photovoltaik ship reinforces this direction, inspiring similar transformations in other industries.

Making It Real: What Shipbuilders Are Learning

Forward-thinking shipbuilders invest heavily in Photovoltaik designs. They’re learning which hull shapes maximize panel mounting area without sacrificing hydrodynamic efficiency. They’re discovering optimal battery placement for weight distribution and heat management. They’re developing modular systems that retrofit onto existing vessels, not just new builds.

These real-world lessons accumulate quickly. Design teams share knowledge across companies and countries. University research programs explore next-generation materials and systems. International maritime conferences focus increasingly on electric and renewable propulsion. This knowledge spillover accelerates improvement across the entire industry.

Some shipping companies now require solar-hybrid designs on all new vessel orders. They’re committing capital to innovation because they believe Photovoltaik represents the future. Other companies wait and watch, preferring to let early adopters bear the learning costs. Eventually, lagging companies will be forced to adopt cleaner technologies or lose market share to more progressive competitors.

The Vessel Revolution Happening Now

The maritime industry stands at an inflection point. Traditional diesel-powered ships built decades ago continue operating because ships typically last 25 to 30 years. But the ships being built today and tomorrow incorporate clean energy from the start. Over the next 20 years, the global fleet will gradually shift toward Photovoltaik and other clean propulsion technologies simply through natural replacement cycles.

This transition won’t happen overnight. Large transoceanic cargo ships will remain primarily fossil-fueled for some years—the physics and economics don’t yet support solar alone. But ferries, harbor workboats, research vessels, short-sea cargo ships, and luxury yachts will increasingly sport solar arrays. This diversity of application strengthens the overall maritime sector by distributing clean technology across different vessel types.

As solar technology costs continue their relentless decline and battery technology improves, the economics become even more favorable. Grid-scale solar installations have dropped 90 percent in cost over the past decade. Marine installations will follow a similar trajectory, though at a slower pace due to marine-grade requirements. Within 10 years, solar systems should cost substantially less in real terms than they do today.

Conclusion: A Cleaner Future on the Horizon

Fleet of futuristic solar-powered ships sailing toward a sustainable future
HMS Photovoltaik represents the dawn of a cleaner, more sustainable future for maritime transport.

HMS Photovoltaik represents far more than a clever naming of solar ships. It represents recognition that maritime transport must transform to address climate change and environmental challenges. It shows that clean technology can be integrated into practical, profitable ships that move cargo and passengers safely and reliably.

The technology exists today. Real ships powered by solar and batteries sail the seas right now. Economics are improving. Regulatory pressure mounts. Shipping companies increasingly recognize that Photovoltaik designs make business sense, not just environmental sense. What once seemed like a distant possibility has become an emerging reality.

Over the next decade, don’t be surprised to see solar panels becoming as common on ships as they are on buildings. The maritime revolution isn’t coming—it’s already here, quietly unfolding in harbors and on waterways around the world. Every new Photovoltaik vessel that launches carries the future forward, proving that transportation and environmental responsibility can move in the same direction.

Are you cramped for counter space and constantly shuffling cookware around? A rolling kitchen island might be exactly what your kitchen needs. The Latitude Run rolling kitchen island has become a popular choice for homeowners looking to add both storage and workspace without committing to permanent renovations.

This guide walks you through everything you need to know about choosing, using, and maintaining a Latitude Run rolling kitchen island. You’ll learn about key features, sizing considerations, and how to make the most of this mobile kitchen solution.

What Is a Latitude Run Rolling Kitchen Island?

Latitude Run rolling kitchen island with drawers, spice rack, and towel bar in a modern kitchen.
A Latitude Run rolling island adds storage, workspace, and mobility to any kitchen setup.

A Latitude Run rolling kitchen island is a mobile storage and workspace solution made from solid wood and MDF, featuring drawers, cabinets with shelves, a built-in rack for spices and towels, and heavy-duty casters for easy transport. These units combine the functionality of a traditional kitchen island with the convenience of wheels, making them perfect for renters, small kitchens, or anyone who wants flexible kitchen arrangements.

Why Choose a Rolling Kitchen Island?

Extra Counter Space When You Need It

Rolling islands provide additional counter space for chopping, mixing, and staging ingredients while keeping your primary counters clear for everyday tasks. When you’re done prepping, simply roll it aside.

Storage Without Built-In Costs

Adding a built-in kitchen island can cost between $3,000 and $20,000, while rolling carts offer a budget-friendly solution that doesn’t require professional installation. The Latitude Run models feature two drawers and cabinets with shelves for organizing kitchenware, with a built-in rack keeping spices and towels within arm’s reach.

Flexibility for Small Spaces

With proper spacing (at least 36 inches between a counter and a kitchen island recommended), you can roll the cart out of the way when you need more space. This makes rolling islands ideal for apartment dwellers who can’t make permanent changes.

Key Features of Latitude Run Rolling Kitchen Islands

Feature Description Benefit
Solid Wood & MDF Construction Durable frame with natural wood countertop Long-lasting and attractive
Locking Casters Four casters with two locking wheels Easy mobility when needed, stability when cooking
Dual Storage Two drawers plus cabinets with shelves Keeps cookware organized and out of sight
Built-in Racks Spice rack and towel bar Convenient access to frequently used items
Neutral Finishes Natural wood tones and painted options Blends with various kitchen styles

Choosing the Right Size Rolling Island

Standard Measurements to Consider

Standard kitchen islands typically measure around 36 inches in height, with common sizes being 4 feet long by 2 feet wide for smaller spaces. However, rolling islands often come in more compact configurations to maintain mobility.

For small kitchens, a 4 ft. x 2 ft. island is perfect for extra prep space, while medium kitchens can accommodate 6 ft. x 3 ft. islands that add seating and storage.

Clearance Requirements

Leave at least 42 to 48 inches of clearance between the island and nearby counters or appliances to ensure easy access, smooth workflow, and prevent collision between open drawers, dishwasher doors, and people walking through.

Before purchasing, measure your kitchen carefully. Use painter’s tape on the floor to mark where your island will sit, then walk through your normal kitchen routine to check if the placement works.

Kitchen Size Guidelines

Kitchen Size Recommended Island Dimensions Key Considerations
Compact (70-130 sq ft) 24″-36″ wide x 36″-60″ long Focus on mobility and multifunctionality
Medium (130-160 sq ft) 36″-48″ wide x 60″-84″ long Room for integrated storage and casual seating
Large (160+ sq ft) 48″-72″+ wide x 84″-108″+ long Space for multiple features and seating for 4-6

Assembly and Setup Tips

Person assembling a rolling kitchen island with clear instructions and organized tools.
Assembly is straightforward—most users can complete it solo with basic tools.

What to Expect During Assembly

Customer reviews note that assembly instructions are easy to follow, with parts unique enough to prevent incorrect installation. Most users report needing assistance only with installing the doors, making it manageable as a one-person job otherwise.

One satisfied owner shared: “Assembly did take a little while but it wasn’t too bad. All the holes and everything aligned just fine. I tested the sturdiness of it by loading it up with all my kitchen accessories and it still rolled just fine, it wasn’t shaky and there was no bowing of any of the shelves.”

Assembly Best Practices

Here’s how to make your setup go smoothly:

Before You Start:

  • Clear a large workspace where you can lay out all parts
  • Check that you’ve received all components listed in the manual
  • Have a drill, screwdriver, and Allen wrench ready

During Assembly:

  • Sort hardware by type and size
  • Follow the numbered steps without skipping ahead
  • Hand-tighten screws first, then fully secure once alignment is confirmed
  • Ask for help when attaching doors or the countertop

After Assembly:

  • Test all drawers and cabinet doors before loading
  • Ensure casters roll smoothly and locks engage properly
  • Check that the unit is level before placing items inside

Maintenance and Care

Daily Cleaning

Use mild soap and water to clean surfaces, avoiding harsh chemicals that can damage finishes. Wipe down the countertop after each use to prevent stains and buildup.

For natural wood countertops, a quick wipe with a damp cloth keeps the surface clean without over-saturating the wood.

Regular Maintenance Tasks

Regularly check the wheels for any obstructions or wear to ensure smooth movement. Here’s a simple maintenance schedule:

Weekly:

  • Wipe down all surfaces with mild cleaner
  • Empty and reorganize drawers and cabinets
  • Check caster wheels for debris

Monthly:

  • Tighten any loose screws or hardware
  • Apply wood conditioner to natural wood surfaces
  • Test locking mechanisms on casters

Quarterly:

  • Deep clean inside cabinets and drawers
  • Inspect joints and connections for wear
  • Touch up paint or finish if needed

Protecting Your Investment

Keep your rolling island away from direct heat sources like ovens or stoves. While the surface can handle hot pads, direct contact with hot pans may damage the finish.

If your island has a butcher block top, treat it with food-safe mineral oil every few months to prevent drying and cracking.

Styling Your Rolling Island

Styled rolling kitchen island decorated with kitchen accessories and plants.
Style your rolling island with decorative items and everyday essentials for a polished look.

Matching Your Kitchen Aesthetic

The Latitude Run’s neutral hues and molded details blend effortlessly into both monochromatic and vibrant color palettes. Whether your kitchen is modern, farmhouse, or traditional, these islands adapt to your style.

Functional Organization Ideas

Top Surface:

  • Keep a cutting board and knife block for quick meal prep
  • Display a fruit bowl or decorative canisters
  • Place your stand mixer or other frequently used appliances

Drawer Storage:

  • Utensils and kitchen tools in top drawers
  • Measuring cups, thermometers, and small gadgets
  • Kitchen linens like dish towels and aprons

Cabinet Storage:

  • Pots and pans on lower shelves
  • Small appliances you don’t use daily
  • Baking supplies and mixing bowls
  • Pantry overflow items

Built-in Racks:

  • Spice bottles in the designated rack
  • Dish towels on the towel bar
  • Paper towels if your model includes a holder

Common Uses Beyond the Kitchen

Multi-Room Functionality

Your rolling island doesn’t have to stay in the kitchen. These versatile pieces can serve as dining bars, hotel carts, bakers racks, microwave carts, or workstations, fitting into various rooms like the dining room or hallway.

Dining Room: Roll it in as a buffet station during dinner parties Home Office: Use as a mobile desk or storage for supplies Craft Room: Keep supplies organized and accessible Outdoor Entertaining: Move it to the patio for BBQs (weather permitting)

Comparing Latitude Run to Other Brands

Brand Price Range Key Differentiator Best For
Latitude Run $150-$300 Solid wood construction with built-in organization Budget-conscious buyers wanting quality
Lark Manor $150-$300 Adjustable shelves and 360-degree rolling wheels Customizable storage needs
Homestyles $200-$400 Drop-leaf tabletop and multiple finish options Families needing homework/snack space
IKEA $100-$250 Minimalist design and global availability Modern aesthetic preferences

Real User Experiences

What Customers Love

Users appreciate that the island is “very sturdy, rolls easily, and the wheel locks keep it where you want when engaged,” describing it as “an attractive and stylish piece fully assembled.”

One customer with a smaller kitchen shared: “We have a smaller kitchen so I wanted something with wheels that I could move around and this was the perfect fit. I made it a stand that holds my instant pot because I use it a lot and it has all kinds of accessories and the shelving underneath holds it all.”

Considerations Before Buying

While most reviews are positive, consider these factors:

Weight Capacity: Load items gradually and test stability Floor Type: Works best on hard surfaces; may be difficult to roll on carpet Assembly Time: Plan for 2-3 hours for initial setup Drawer Depth: Some models have thinner drawers better suited for lighter items

Frequently Asked Questions

How much weight can a Latitude Run rolling kitchen island support?

Customer reviews show users successfully loading islands with multiple kitchen accessories, with shelves holding pots, pans, and appliances without bowing or instability. Always check your specific model’s weight specifications.

Can I lock the wheels to keep the island stationary?

Yes, Latitude Run rolling islands feature four casters with two locking wheels that keep the unit in place when locked and roll easily when unlocked.

Will this work in my small apartment kitchen?

Compact kitchens measuring 70-130 sq ft benefit most from rolling islands around 24″-36″ wide by 36″-60″ long, as mobility and multifunctionality are key. Measure your space carefully and ensure adequate clearance.

How do I care for the natural wood countertop?

Clean with mild soap and water after each use. Apply food-safe mineral oil or wood conditioner every 2-3 months to prevent drying and maintain the wood’s appearance.

Let’s be honest—building a home feels overwhelming. You’ve got a million decisions to make, and one of the biggest is figuring out the right size. Too big, and you’re stuck with rooms you’ll never use (hello, endless cleaning). Too small, and you’re tripping over each other by week two.

That’s where 1500 sq ft house plans come into play. This size has become incredibly popular, and for good reason. It’s roomy enough for a family but won’t leave you drowning in mortgage payments or weekend maintenance marathons.

Young families, downsizers, and first-time builders are all gravitating toward these medium-size home layouts. They fit suburban lots perfectly, work surprisingly well in urban areas, and—here’s the kicker—they’re actually affordable to build and maintain. Throughout this guide, we’ll dig into different affordable house designs, talk about what layouts work best, and help you figure out if 1500 square feet is your magic number.

Why 1500 Sq Ft House Plans Are Ideal for Modern Living

So what’s the big deal about 1500 square feet anyway? Why is everyone suddenly obsessed with this particular size?

“The 1500 square foot range is the goldilocks zone of residential design. It’s large enough for comfortable family living but small enough to keep energy costs manageable and maintenance reasonable. We’re seeing more clients specifically request this size.” — David Chen, Residential Architect

Think about it this way: you can easily fit three bedrooms, two full bathrooms, a decent kitchen, and a living area that doesn’t feel cramped. That’s perfect for a family of four. You’ve got space for kids to do homework, parents to work from home occasionally, and everyone to gather for dinner without bumping elbows.

But here’s what makes it brilliant—it’s not so massive that you’re spending every Saturday cleaning or every winter paying ridiculous heating bills. Compact home designs like these actually encourage smarter living. You can’t hoard junk you don’t need because there’s simply no room for it.

These space-efficient homes also adapt beautifully to different lot sizes. Got a tight urban plot where land costs a fortune? A 1500 sq ft footprint maximizes your investment. Living in the suburbs with more breathing room? Great—you’ll have yard space left over for gardening or a play area.

Housing data consistently shows that modern family homes in this size range hold their value exceptionally well. They appeal to nearly everyone: young families starting out, empty nesters scaling down, and even investors looking for rental properties. That’s a pretty solid selling point if you ever decide to move.

Popular Layout Ideas for 1500 Sq Ft Homes

3D floor plan of 1500 sq ft house showing open layout and three-bedroom design.
Smart 1500 sq ft layouts make every inch count with open, functional designs.

Choosing your layout is where things get fun. Your 1500 sq ft house plans can look dramatically different depending on how you arrange the space. Let’s break down the most popular options:

Single-Story House Plans
Everything lives on one floor with these designs. No stairs to climb, no second-floor laundry headaches. If you’ve got young kids who might tumble down stairs, elderly parents visiting regularly, or you’re just thinking ahead to retirement, single-story makes total sense. Most versions give you three bedrooms, an open living area, and often an attached garage. The main downside? You’ll need a wider lot since you’re spreading out instead of building up.

“We chose a single-story 1500 sq ft plan for our retirement home, and it’s been perfect. Everything is on one level, which means no stairs to worry about as we age. The layout feels spacious without being overwhelming to maintain.” — Margaret Thompson, Homeowner

Two-Story House Plans
Working with a smaller lot? Go vertical. Two-story designs typically stack bedrooms upstairs while keeping your kitchen, living room, and dining space downstairs. This creates natural privacy—kids can be noisy upstairs while you’re hosting dinner guests below. Plus, you can often squeeze in higher ceilings on the main floor, which makes everything feel more luxurious.

Open Floor Plan Homes
Knock down those walls! Open concept layouts merge your kitchen, dining area, and living room into one flowing space. It’s become the standard for modern 3-bedroom home layouts because it genuinely makes homes feel bigger than they are. You can cook dinner while keeping an eye on kids doing homework. You can host parties without feeling isolated in the kitchen. The trade-off? Less privacy and noise travels everywhere.

L-Shaped Layouts
These wrap around a courtyard or patio area, creating a semi-private outdoor space that’s protected from street noise. They’re fantastic on corner lots and naturally separate your public zones (kitchen, living room) from private ones (bedrooms). If you love outdoor living but want some privacy, this layout deserves a serious look.

U-Shaped Layouts
Similar concept to L-shaped, but you’re creating a fully enclosed courtyard in the middle. This gives you maximum privacy and lets you install huge windows facing inward without worrying about neighbors peering in. The interior floods with natural light from the courtyard. The catch? You’ll need a larger lot to make this work properly.

Layout Comparison Table

Layout Type Best For Lot Size Needed Privacy Level Outdoor Access Cost Factor
Single-Story Families with children, elderly, accessibility needs Medium to Large Moderate Good Moderate
Two-Story Smaller lots, growing families Small to Medium High Limited Lower
Open Floor Plan Entertainers, modern lifestyle Any Low Moderate Moderate
L-Shaped Outdoor enthusiasts, corner lots Medium to Large High Excellent Higher
U-Shaped Privacy seekers, courtyard lovers Large Very High Excellent Higher

Your lifestyle should drive this decision. Do you entertain constantly? Open floor plan. Got a toddler and planning for more kids? Maybe two-story for future privacy. Thinking long-term about mobility issues? Single-story wins.

Interior Design and Space Optimization Tips

Open-concept living room in 1500 sq ft home with bright interiors and modern decor
Neutral colors, light, and smart furniture choices make small spaces feel spacious.

Alright, so you’ve picked your layout. Now let’s talk about making your small home interiors feel way bigger than they actually are. These tricks genuinely work:

Maximize Natural Light
Seriously, this is your secret weapon. Big windows, skylights, glass doors—they completely transform how spacious a room feels. Think strategically about window placement. Morning sun in bedrooms helps everyone wake up naturally. Afternoon light in living areas creates warmth during peak family time. Don’t skimp on windows to save a few hundred quid. You’ll regret it every single day.

Choose Multi-Functional Furniture
Every piece needs to earn its keep. That sofa? Make it a sofa bed for guests. Ottoman? Get one with storage inside. Dining table? Find an extendable version. These space-saving tips aren’t just clever—they’re essential when you’re working with 1500 square feet. You simply can’t afford furniture that only does one thing.

Use Vertical Space
Most people completely ignore their walls and then wonder why they’re out of storage. Look up! Install shelving that reaches the ceiling. Use tall bookcases. Hang pots and pans in the kitchen. Mount your TV instead of using a bulky entertainment center.

“The biggest mistake people make in smaller homes is ignoring vertical space. Going up instead of out can add 30-40% more storage without sacrificing floor area. Think floor-to-ceiling bookshelves and wall-mounted solutions.” — Sarah Mitchell, Interior Designer

Stick to a Neutral Color Palette
Light colors make rooms feel bigger. It’s not just designer talk—it’s optical science. Whites, beiges, light grays, and soft tans reflect light and create an airy feeling. You can always punch up personality with colorful throw pillows, artwork, and area rugs that you can swap out seasonally.

Create Zones Without Walls
In open floor plans, you still need to define different areas. Use area rugs to anchor spaces. Hang pendant lights over the dining table. Position furniture to create natural boundaries. A bookshelf can separate your living room from your dining area without blocking light or making things feel closed off.

Modern house interiors in 1500 sq ft homes tend toward minimalism, but that doesn’t mean boring. It means intentional. Choose quality pieces you genuinely love instead of filling rooms with stuff just because you’ve got space to fill.

Cost and Budget Planning for 1500 Sq Ft Homes

Let’s talk money, because that’s probably why you’re reading this in the first place. Understanding construction cost per square foot helps you budget realistically.

In most areas, expect to spend between £100 and £200 per square foot for standard construction. That puts a 1500 sq ft home somewhere between £150,000 and £300,000 in building costs alone. And yes, that’s before you buy land, pay for permits, or prepare the site.

“I always tell my clients that building a 1500 sq ft home is one of the smartest investments. You get all the space you need without overextending financially. The key is choosing where to splurge and where to save.” — James Foster, General Contractor

Ways to Control Costs:

Choose Affordable Building Materials
Materials eat up roughly 50% of your construction budget. Here’s where you can get strategic. Vinyl siding looks great and costs half what brick does. Laminate countertops have come a long way—they’re durable and attractive at a fraction of granite’s price. Engineered wood flooring gives you the wood look without the wood price tag. These swaps can save you £20,000 or more without sacrificing quality or appearance.

Plan for Efficient Systems
Yeah, energy-efficient windows and insulation cost more upfront. But we’re talking about decades of lower utility bills. Do the math on payback period—usually it’s under seven years. After that, it’s pure savings. Same goes for your heating and cooling system. Spend an extra £2,000 on efficiency now, save £300 annually forever.

Avoid Custom Everything
Standard sizes exist for a reason—they’re cheaper. Doors, windows, cabinets—when you stick to standard dimensions, you’re pulling from existing inventory. The moment you want custom sizing, you’re paying someone to special-order or build from scratch. Save customization for one or two features that really matter to you.

Get Multiple Quotes
Never, ever accept the first contractor’s price. Get at least three detailed quotes. Compare them line by line. Check references thoroughly. Home budget planning takes patience, but rushing this decision is expensive.

First-time builders, listen up: set aside an extra 10-15% for surprises. Maybe you hit rock when digging the foundation. Maybe lumber prices spike. Maybe you decide halfway through that you actually do want that upgraded tile. Having a buffer keeps you from panicking when reality hits.

1500 Sq Ft House Plans with Garage or Basement

Modern 1500 sq ft home with attached garage and landscaped exterior.
Adding a garage or basement boosts both functionality and resale value.

Adding extras like a garage or basement can seriously boost both functionality and resale value for your 1500 sq ft house plans.

Attached Garages
A garage isn’t just for cars anymore. It’s weather protection, sure, but it’s also storage for everything from lawn mowers to holiday decorations. House plans with garage options typically add 200-400 square feet to your overall footprint. If you live somewhere with harsh winters or scorching summers, starting your day in a climate-controlled space instead of scraping ice or burning yourself on a steering wheel is genuinely life-changing. Plus, that mudroom-style entry means kids can dump their sports gear without tracking mud through your main living space.

Basement House Designs
This is where things get interesting. A basement essentially doubles your usable square footage. Finish it properly and you’ve got space for a home office, playroom, guest suite, media room—whatever your family needs. Even an unfinished basement gives you tons of storage and hides all those ugly mechanicals (water heater, furnace) somewhere out of sight.

“Adding a basement to our 1500 sq ft plan was the best decision we made. It gave our teenagers their own space downstairs while we kept the main floor for family living. It’s like having two homes in one.” — Robert and Linda Martinez, Homeowners

3-bedroom house with garage particularly appeals to families with active kids. Where else are you going to store bikes, skateboards, camping equipment, and lawn care tools? The garage solves the storage problem that plagues most smaller homes.

Before you get too excited about either option, check your local building codes and soil conditions. Some areas have water table issues that make basements impractical. Other places have setback requirements that affect garage placement.

Where to Find and Download 1500 Sq Ft House Plans

Ready to move forward? Here’s where to actually find architectural blueprints:

Online Plan Marketplaces
Tons of websites specialize in downloadable home plans. You can filter by square footage, bedroom count, architectural style—whatever matters to you. Prices typically range from £500 to £2,000 for a complete set. The advantage? Massive selection and immediate access. The downside? These are stock plans that thousands of others might build too.

Architectural Firms
Want something completely unique? Hire an architect for fully customizable house plans. This is the priciest route—often £5,000 to £15,000 just for plans—but you get exactly what you want, tailored to your specific lot and lifestyle. Worth it if you’ve got unusual land constraints or very specific vision.

Home Builder Portfolios
Many construction companies offer their own standard plans with room for minor modifications. This middle ground works well—you get professional designs that the builder knows how to construct efficiently, plus some customization without starting from scratch. Often the most practical choice for first-time builders.

Free Plan Resources
Some government housing programs and non-profits offer basic plans at no cost. These tend to be simpler, no-frills designs, but if you’re on a tight budget, they’re worth exploring. Just verify they meet current building codes in your area.

Before purchasing any downloadable home plans, confirm they comply with local building regulations. Most need modifications for regional requirements—things like snow load calculations, wind resistance ratings, or energy efficiency standards vary significantly by location.

Final Thoughts

1500 sq ft house plans hit a sweet spot that’s hard to beat. You get comfortable living space for a family without the financial burden or maintenance headaches of oversized homes. Whether you go with a single-story design for easy accessibility, embrace an open floor plan for modern entertaining, or add a garage and basement for maximum functionality, there’s definitely a configuration that matches your lifestyle.

The key is doing your homework before breaking ground. Visit actual homes in this size range. Walk through them. Open closets. Stand in the kitchen and imagine cooking. Sit in the living room and picture family movie night. Numbers on paper don’t tell the whole story—you need to experience how 1500 square feet actually feels.

Check out different small family house ideas online, but don’t get paralyzed by options. At some point, you need to commit to a design and move forward. Download a few plans that speak to you, meet with local builders about structural requirements and costs, and start building a new home that balances space, style, and your budget.

Want more home design inspiration and practical building advice? Subscribe to our newsletter for tips delivered straight to your inbox each week. We cover everything from choosing the right contractor to designing the perfect kitchen layout—all the real-world stuff that actually matters when you’re building your dream home.

Kids Room Essentials ththomedec include a comfortable bed, storage solutions, desk or activity area, proper lighting, soft rugs, and personal touches. These items create functional, safe spaces where children can sleep, play, and grow.

Your child’s bedroom is more than just a place to sleep. It’s where they dream, play, create, and discover who they are. Setting up this space right makes all the difference in their daily life. You need the right pieces to make their room work for them, not against them.

Let’s walk through everything you need to create a room your child will actually want to spend time in.

The Foundation: Beds That Grow With Your Child

Every great kids’ room starts with the right bed. You want something safe, comfortable, and built to last through more than just a few years.

Twin beds are the most popular choice for kids’ rooms. They fit most spaces without taking over the whole room. You still have space left for play areas and storage. If you have two kids sharing a room, bunk beds save tons of floor space. Your kids can each have their own sleeping area without crowding the room.

Toddler beds work great for little ones making the jump from cribs. They sit lower to the ground, which makes parents feel better about middle-of-the-night movements. Some beds even convert from cribs to toddler beds to twin beds. You buy once and use for years.

Storage beds are total game changers. They have drawers built right into the bed frame. All those extra blankets, off-season clothes, and toys have a home. You free up closet space and keep the room looking clean.

Storage Solutions That Actually Work

Kids have stuff. Lots of stuff. You need places to put all of it, or you’ll be stepping on toys forever.

Toy boxes are the classic choice for a reason. Kids can toss everything in at cleanup time. Look for boxes with soft-close hinges so little fingers stay safe. Some come with cushioned tops that double as extra seating.

Cube storage systems give you more control over organization. Each cube can hold a fabric bin or basket. Label the bins and your kids know exactly where things go. These systems grow with your child too. Toy bins become book bins become school supply bins over the years.

Bookcases keep books visible and easy to grab. Kids are more likely to read when they can see their options. Forward-facing book displays work especially well for younger children who can’t read spines yet. Regular bookcases with adjustable shelves work for older kids who have bigger collections.

Under-bed storage uses space you already have. Rolling bins slide right under the bed frame. Store out-of-season clothes, extra bedding, or toys that only come out sometimes. Everything stays dust-free and out of sight.

A Desk or Activity Area for Learning and Creating

Kids need a dedicated spot for homework, art projects, and building things. A proper workspace helps them focus and keeps supplies organized.

Basic desks with drawers give kids a surface to work on and storage for supplies. Look for desks at the right height for your child. Their feet should touch the floor when they sit. Adjustable chairs help get the ergonomics right as they grow.

Activity tables work better for younger kids. They sit lower than regular desks. Multiple kids can work together on puzzles or art projects. Some have storage cubbies built right in.

Wall-mounted desks save floor space in small rooms. They fold up when not in use. You still get a full work surface when you need it.

Craft tables with paper roll holders make art time easier. Some even have built-in storage for markers, crayons, and paint supplies. Everything your little artist needs stays in one spot.

A colorful kids' study corner featuring a small desk, yellow and green shelves, and organized art supplies for creative learning.
A playful study area with a small desk, vibrant yellow and green shelves, and neatly arranged art supplies for children.

Seating That Fits Their Size

Kids need comfortable places to sit that are actually made for their bodies. Adult furniture is too big and often too formal for play and relaxation.

Bean bag chairs are soft, safe, and kids love them. They conform to any sitting position. Perfect for reading time or gaming sessions. They come in tons of colors and patterns to match any room theme.

Kids’ armchairs give them their own special seat. These scaled-down chairs make kids feel grown up. Look for ones with sturdy frames that can handle some rough play.

Floor cushions and poufs add extra seating without taking up permanent space. Stack them in a corner when not in use. Pull them out for sleepovers or movie nights.

Rocking chairs or gliders work great in younger kids’ rooms. They’re calming for bedtime routines. Some parents keep the ones from nursery days because kids still love them.

Rugs That Define Play Spaces

A good rug does more than just look nice. It creates a defined play area, adds warmth, and protects floors from wear and damage.

Area rugs under play spaces give kids a soft surface for building and playing. They also reduce noise if you have neighbors below you. Look for rugs that can handle spills and are easy to clean.

Educational rugs with letters, numbers, or maps make learning fun. Kids can play games while learning their ABCs. Road map rugs turn into instant play surfaces for cars and trucks.

Soft shag rugs feel amazing under bare feet. Kids love the texture. These work great in reading nooks or next to beds.

Low-pile rugs are easier to clean than high-pile options. Toy cars roll better on them too. They’re practical choices for active kids who play hard.

Lighting for Every Activity

Good lighting matters more than you think. Your child needs different types of light for different activities throughout the day.

Overhead lights provide general room lighting. Ceiling fixtures with dimmer switches let you adjust brightness for different times of day. Bright light for morning routines, softer light for bedtime.

Desk lamps help kids focus on homework and reading. Position the lamp on the opposite side from their writing hand to avoid shadows. LED bulbs stay cool and use less energy.

Night lights ease bedtime fears. Soft glowing lights help kids feel safe without being bright enough to disrupt sleep. Some plug directly into outlets. Others sit on nightstands.

String lights or twinkle lights add a magical touch. Kids love them. They provide soft ambient lighting that makes the room feel cozy. Perfect for reading before bed or just creating a calm atmosphere.

Wall Decor That Inspires

Empty walls are missed opportunities. The right wall decor makes a room feel personal and complete.

Framed pictures of family and friends remind kids they’re loved. Mix in photos of your child doing things they enjoy. It builds confidence and positive self-image.

Wall art featuring their interests makes the room feel like their space. Whether it’s animals, sports, space, or favorite characters, let their personality show. Removable wall decals work great because you can change them as interests change.

Growth charts track how much they’ve grown over the years. Kids love seeing their progress. Some double as cute decor pieces that match room themes.

Floating shelves display special items without taking floor space. Show off trophies, favorite books, or collections. Kids feel proud seeing their accomplishments on display.

Organizational Must-Haves

Beyond basic storage, some smaller organizational tools make daily life easier.

Laundry hampers teach kids to put dirty clothes in one spot. Look for hampers they can carry to the laundry room themselves. This builds independence and helps with chores.

Hooks on walls or behind doors create instant storage for backpacks, jackets, and hats. Kids can reach them easily. Items don’t end up piling on the floor.

Closet organizers maximize space inside closets. Hanging shelves, shoe racks, and drawer units help everything have a place. Kids can actually find their clothes in the morning.

Bins and baskets in various sizes work for everything from small toys to stuffed animals. Clear bins let kids see what’s inside. Labeled fabric bins look better and still keep things organized.

Window Treatments for Better Sleep

Good window coverings block light and provide privacy. Quality sleep matters for growing kids.

Blackout curtains help kids sleep past sunrise. They’re especially helpful during summer months when the sun comes up early. Room-darkening shades work well too.

Regular curtains or drapes add softness and color to the room. Choose patterns or colors that match the room’s theme. Make sure they’re hung high and wide to make windows look bigger.

Cordless blinds are safer for young children. No dangling cords means no strangulation risk. Many styles work with cordless systems now.

Creating Age-Appropriate Spaces

What works for a toddler won’t work for a teenager. Plan ahead but stay flexible.

For toddlers and preschoolers, everything should be low and accessible. They need to reach their toys, books, and clothes independently. Safety is priority number one. Anchor all furniture to walls. Cover outlets. Choose rounded furniture edges.

Elementary-age kids need more desk space and better lighting for homework. Their interests become more defined. Let them help pick decor themes. Storage needs to handle sports equipment, hobby supplies, and growing book collections.

Tweens and teens want spaces that feel mature. Let them have input on colors and layouts. They need privacy and personal expression. Better desks and chairs support longer study sessions. More sophisticated storage handles clothes, electronics, and personal items.

Smart Shopping Tips

You don’t need to buy everything at once. Start with essentials and add pieces over time.

Measure your space before shopping. Know what fits where. Nothing is worse than buying furniture that won’t fit through the door or takes up too much room.

Choose quality for items that get heavy use. Beds, desks, and main storage pieces should last years. You can save money on decor items that change more frequently.

Look for multi-functional pieces. Beds with storage, desks with hutches, and benches that open for storage give you more for your money. Every piece should earn its place in the room.

Buy with growth in mind. Adjustable furniture and neutral storage pieces work through multiple stages. You can update the room with new bedding, curtains, and decor without replacing major furniture.

Making It All Work Together

The best kids’ rooms balance function with personality. Your child should love their space while still being able to use it effectively.

Start with the bed placement. Position it away from windows for better sleep. Make sure there’s space to walk around it. Everything else works around the bed.

Create zones for different activities. A sleep zone with the bed and night light. A play zone with toy storage and soft surfaces. A work zone with desk and supplies. Each area has a purpose.

Keep frequently used items within easy reach. Daily clothes in accessible drawers. Favorite toys in easy-to-open bins. School supplies at the desk. This builds independence and makes cleanup easier.

Leave open floor space for play and movement. Kids need room to be kids. Don’t fill every inch with furniture. Open space is valuable space.

Side-by-side images of a toddler's cozy bedroom and a teen's upgraded room, showcasing the evolution of children's spaces.
Two images depict a toddler’s cozy bedroom alongside a teen’s upgraded version, illustrating the transition of personal spaces.

Your Child’s Dream Room Starts Here

Creating a great kids’ room doesn’t have to be complicated or expensive. Focus on the essentials first. Add personality and style as you go. The goal is a space where your child feels safe, comfortable, and happy.

Start with a quality bed that fits your space and budget. Add storage that makes sense for your child’s age and needs. Include a work surface for learning and creating. Layer in comfortable seating and soft surfaces. Finish with lighting and personal touches that make the room uniquely theirs.

Your child’s room will change as they grow. That’s perfectly normal. The foundation you build now can adapt and evolve. Choose wisely, involve your child in decisions when appropriate, and create a space that serves them well for years to come.

Every child deserves a room that works for them. With the right essentials in place, you’re giving them exactly that.

Transform your living space with MintpalDecor’s practical approach to interior design. Learn essential principles, master color choices, optimize lighting, and create functional layouts that reflect your personality without overspending or needing professional training.

Interior design doesn’t have to feel like climbing a mountain without a map. If you’ve ever walked into a beautifully decorated home and wondered how people make it look so effortless, you’re in the right place. Learning how to be better at interior design MintpalDecor style means understanding that great design isn’t about fancy degrees or unlimited budgets. It’s about knowing what makes a space feel right and having the confidence to make it happen.

Think of your home as a story waiting to be told. Every piece of furniture, every paint color, and every little decorative touch is a word in that story. The good news? You’re the author, and MintpalDecor is here to help you write something amazing. This isn’t about copying what you see in magazines or making your house look like a showroom. It’s about creating spaces that work for your real life while looking absolutely fantastic.

A cozy living room featuring a white couch, wooden table, beige walls, green plants, and warm ambient lighting.
Stylish living room with a white couch, wooden table, beige walls, and green plants, creating a warm, inviting atmosphere.

Understanding What Makes MintpalDecor Different

MintpalDecor started with a simple mission that changed how regular people think about decorating their homes. Instead of throwing complicated design jargon at you or suggesting furniture that costs more than your car, they broke everything down into steps that actually make sense. Their approach focuses on real people with real budgets who want beautiful homes without the stress.

What sets MintpalDecor apart is their belief that anyone can learn good design. You don’t need to understand architectural theory or memorize color wheels. You just need to pay attention to what feels good and learn a few basic principles that guide your choices. They’ve helped thousands of people transform their spaces from confusing and cluttered to cozy and intentional.

The platform offers more than just pretty pictures. They provide practical solutions for common problems like making small rooms feel bigger, choosing furniture that fits your space, and mixing different styles without everything looking like a mess. Their philosophy centers on quality over quantity, which means buying fewer but better pieces that you’ll love for years instead of filling your home with cheap stuff that falls apart.

Start With a Clear Vision Before Moving Anything

Here’s something most people get wrong when they start decorating. They rush to the furniture store or start painting walls without really thinking about what they want. This is like starting a road trip without knowing your destination. You might end up somewhere interesting, but it probably won’t be where you wanted to go.

Before you move a single piece of furniture or pick up a paintbrush, take time to figure out what you actually want from your space. Close your eyes and imagine how you want to feel when you walk into the room. Do you want calm and peaceful? Energized and creative? Cozy and comfortable? Your answers will guide every decision you make from here on out.

Creating a vision board might sound like something from a craft show, but it works incredibly well. Start collecting images of rooms that make you stop scrolling. Don’t worry about why you like them yet, just save them. After you have about twenty images, look for patterns. Maybe you’re drawn to rooms with lots of natural light, or perhaps you keep saving spaces with warm wood tones and soft textiles. These patterns reveal your personal style better than any quiz or questionnaire.

Write down three to five words that describe your ideal space. These become your design compass. When you’re shopping and can’t decide between two items, ask yourself which one fits your words better. This simple trick prevents those impulse purchases that look great in the store but feel wrong once you get them home. Your vision keeps you focused and saves you money by preventing mistakes.

Master the Essential Design Principles That Actually Matter

You don’t need to memorize a textbook of design rules, but understanding a few core principles will dramatically improve your results. Think of these as the grammar of interior design. Once you know them, everything else starts making sense naturally.

Balance is the first principle worth understanding. When you walk into a room that feels “off,” there’s usually a balance problem. Maybe all the heavy furniture is crowded on one side, or perhaps everything is the same height and creating a flat, boring look. Good balance doesn’t mean everything has to be symmetrical like a museum. It means the visual weight should feel distributed throughout the space.

Scale and proportion sound fancy, but they’re simple concepts. A huge sectional sofa in a tiny apartment makes the room feel even smaller. Tiny artwork on a massive wall looks lost and lonely. Things should fit the space they’re in. Before buying large furniture pieces, measure everything twice. Better yet, use painter’s tape on the floor to mark out dimensions so you can walk around and see if it actually fits.

Rhythm in design means creating a sense of movement through repetition. This could be repeating colors, patterns, or shapes throughout a space. If your living room has navy blue throw pillows, bringing that same blue into your curtains or artwork creates rhythm. Your eye travels naturally through the space instead of jumping around trying to find connections.

Contrast adds the spice that keeps rooms interesting. If everything in your space is soft and rounded, adding something angular creates visual interest. If all your colors are neutral, one bold accent color makes everything pop. The key is intention. Random contrast creates chaos, but planned contrast creates excitement.

Discover Your Personal Style Without Getting Lost

Walking into a furniture store or scrolling through design websites can feel overwhelming when every style looks good in its own way. Modern minimalism is sleek and clean. Bohemian spaces feel relaxed and artistic. Traditional rooms offer warmth and elegance. How do you pick just one?

Here’s a secret that MintpalDecor teaches: you don’t have to pick just one style. The most interesting spaces often mix elements from different styles to create something unique. The trick is finding a common thread that ties everything together. This could be a color palette, a specific material like natural wood, or even a mood like “relaxed elegance.”

Try the five-photo exercise that MintpalDecor recommends. Find five rooms that you absolutely love and write down three words that describe each one. Look at your list of words and circle the ones that appear most often. If “warm,” “natural,” and “cozy” keep showing up, you probably lean toward organic, comfortable styles rather than ultra-modern minimalism. This exercise cuts through the confusion and shows you what your instincts already know.

Remember that your style can evolve over time, and that’s perfectly fine. Your home should grow with you. Don’t stress about committing to one look forever. Start with pieces that feel right now, and trust that you can adjust and change things as your taste develops. The goal isn’t perfection from day one. It’s creating a space that feels authentically yours.

Color Theory Made Simple and Actually Useful

A modern living room featuring blue accent chairs, a coffee table, and large windows allowing natural light to fill the space.
A stylish living room with blue chairs, a coffee table, and soft neutral walls, illuminated by natural light from large windows.

Color intimidates people more than almost anything else in interior design. Walk into a paint store and face thousands of options, and suddenly you’re paralyzed with choice. But understanding how to use color doesn’t require an art degree. It just takes a few practical guidelines.

The sixty-thirty-ten rule makes color selection much easier. Use your dominant color for about sixty percent of the room, typically on walls. Your secondary color covers about thirty percent, usually furniture and major textiles. The final ten percent is your accent color in accessories like pillows, artwork, and small decorative items. This formula creates balance automatically without requiring complicated planning.

Warm colors like reds, oranges, and yellows energize a space and make it feel more intimate. They’re perfect for social rooms like kitchens and dining areas where you want people to feel engaged and lively. Cool colors like blues, greens, and purples create calm and relaxation. They work beautifully in bedrooms and bathrooms where you want to unwind.

Neutral colors deserve more credit than they get. Beige, gray, white, and cream might seem boring, but they’re actually the most versatile players on your team. They create a peaceful backdrop that lets your furniture and accessories shine. Plus, neutral rooms are easier to update with new accent colors when you want a fresh look without repainting everything.

Before committing to a paint color, test it on your actual walls. Paint a large square, at least two feet by two feet, and look at it at different times of day. Colors change dramatically depending on natural light. That perfect gray might look purple in morning light or green in the evening. Living with the sample for a few days prevents expensive mistakes.

Lighting Changes Everything More Than You Think

If there’s one thing that separates amateur design from professional results, it’s lighting. You could have the perfect furniture, beautiful colors, and great accessories, but bad lighting will make everything fall flat. Good lighting, on the other hand, can make even basic rooms look expensive and thoughtfully designed.

Natural light is your best friend, so maximize it wherever possible. Heavy, dark curtains might offer privacy, but they also block the free, beautiful light that makes spaces feel alive. Consider sheer curtains or adjustable blinds that let you control light while still letting sunshine filter through during the day. If privacy isn’t an issue, leaving windows uncovered creates the most open and airy feeling.

Every room needs three types of lighting working together. Ambient lighting provides overall illumination and usually comes from ceiling fixtures or chandeliers. Task lighting helps you do specific activities like reading, cooking, or working at a desk. Accent lighting highlights special features like artwork, architectural details, or plants. When all three layers work together, your room feels complete and functional at any time of day.

Dimmers are one of the smartest investments you can make. They let you adjust your lighting to match your mood and activity. Bright light for cleaning or working, softer light for relaxing or entertaining. Installing dimmers costs relatively little but adds tremendous flexibility to your space. Plus, dimming lights saves energy and extends bulb life.

Don’t forget about decorative lighting as an element of design itself. A beautiful pendant light or sculptural lamp becomes art that also serves a function. Look for fixtures that match your style while providing the light you need. Sometimes a statement light fixture becomes the focal point of an entire room.

Create Layouts That Actually Work For Real Life

A beautiful room that doesn’t function well is just pretty frustration. Great interior design balances aesthetics with practicality. Your space should look good and work for how you actually live, not how you think you should live.

Start by thinking about traffic flow. People should be able to move through rooms easily without bumping into furniture or taking weird detours. Aim for at least thirty inches of walking space between furniture pieces. If you’re constantly squeezing between the couch and coffee table, something needs to move.

Avoid pushing all your furniture against the walls like you’re making room for a dance floor. Floating furniture creates conversation areas and makes rooms feel more intimate and intentional. Pull your sofa away from the wall by a few feet and see how the space suddenly feels more designed and less like a waiting room.

Use area rugs to define different zones, especially in open floor plans. A rug under your dining table separates the eating area from the living space even when there are no walls. Make sure your rug is large enough that at least the front legs of furniture sit on it. Tiny rugs floating in the middle of a room look lost and disconnected.

Before moving heavy furniture around, try a simple trick that saves your back and prevents mistakes. Use painter’s tape or even sheets of newspaper to mark where furniture will go on the floor. Walk around these paper templates and see if the layout actually works for your daily activities. This planning step prevents the frustrating furniture shuffle where you move everything three times before finding the right arrangement.

Mix Textures to Add Depth and Interest

Flat, one-dimensional rooms feel cold and sterile no matter how expensive the furniture. The secret to spaces that feel rich and inviting is layering different textures throughout. Texture engages more senses than just sight, making rooms feel more complete and welcoming.

Think about combining hard and soft surfaces. A leather sofa with velvet pillows creates instant visual interest. A sleek metal coffee table on a chunky woven rug provides contrast that makes both elements look better. Wood, glass, metal, ceramic, linen, cotton, velvet, and wool all bring different qualities to your space. The variety keeps your eye moving and creates a more sophisticated look.

Soft layers like throw blankets, pillows, and rugs make spaces feel cozy and livable. These are the elements that make you want to curl up and stay awhile. Don’t be afraid to mix patterns here either. A solid couch can handle patterned pillows in different scales as long as they share a common color scheme.

Natural materials bring warmth that synthetic materials can’t match. Real wood furniture, stone surfaces, natural fiber rugs, and cotton or linen textiles create an organic feeling that makes spaces feel grounded and comfortable. Even small touches like a wooden bowl or stone decorative objects add texture that makes rooms more interesting.

Smart Shopping Strategies That Protect Your Budget

Creating a beautiful home doesn’t require unlimited funds. It requires smart choices about where to spend and where to save. Understanding this difference lets you create high-end looks with realistic budgets.

Invest in pieces you use every day and touch frequently. Your mattress, sofa, office chair, and dining chairs should get the bulk of your furniture budget. These items affect your daily comfort and last for years when you buy quality. Cheap versions of heavily used furniture break down quickly and end up costing more when you have to replace them.

Save money on decorative accessories that change with trends and seasons. Throw pillows, artwork, vases, and decorative objects can come from budget stores without anyone knowing. These items are easy to switch out when your taste changes or you want a fresh look. Nobody touches your decorative bowl enough to notice if it came from a discount store.

Thrift stores and vintage shops offer incredible finds for people willing to look. Old furniture often has better construction than new budget pieces. A solid wood dresser from the seventies might look dated, but light sanding and a coat of paint transforms it into something custom and expensive-looking. Learning to see potential instead of just seeing current condition opens up amazing budget possibilities.

Shop your own home before buying anything new. That lamp in your guest room might be perfect in your living room. Moving pieces between spaces costs nothing and often solves design problems without spending a penny. Sometimes you already own the perfect solution and just haven’t thought to use it differently.

Add Personal Touches That Tell Your Story

Showroom-perfect spaces might look good in photos, but they feel sterile and cold in real life. Your home should reflect who you are, what you love, and what matters to you. Personal touches transform generic spaces into homes with soul and character.

Display things that have meaning rather than just things that match. Family photos, souvenirs from travels, books you actually read, and collections you’ve built over time all tell your story. These items create conversation starters and make your space uniquely yours in ways that store-bought decor never can.

Edit carefully though. Not everything meaningful needs to be on display simultaneously. Too many personal items create clutter that overwhelms rather than charms. Curate your displays like a museum curator choosing what goes in an exhibition. Select your favorites and give them space to shine rather than cramming everything onto every surface.

Rotate your decor seasonally to keep things feeling fresh without buying new furniture. Switch out pillow covers, swap artwork between rooms, change your throw blankets, or bring in seasonal flowers or greenery. These small changes keep your space evolving and interesting without major investments.

Remember that your home is for living, not for impressing strangers on the internet. If you love something that doesn’t fit current trends, display it anyway. Your space should make you happy every single day, and that matters more than following what designers say you should do.

Keep Learning and Growing Your Design Skills

Interior design is a skill that develops over time through practice and observation. Nobody becomes amazing overnight, and that’s perfectly fine. Every choice you make teaches you something about what works and what doesn’t in your space.

Pay attention to spaces you visit in real life. Restaurants, hotels, coffee shops, and friends’ homes all offer design lessons if you look with intention. What makes certain spaces feel welcoming? How do they use lighting? What creates the mood you notice? Training your eye this way costs nothing but awareness.

Take photos of your rooms from different angles to see them with fresh eyes. Sometimes we get so used to our spaces that we stop really seeing them. Photos reveal things that have become invisible to us in daily life, like that weird empty corner or the stack of stuff that’s been sitting on the chair for three months.

Don’t be afraid to make mistakes. Everyone has bought furniture that looked perfect in the store but felt wrong at home. Everyone has painted a wall a color they ended up hating. These experiences teach you about your taste and preferences in ways that just looking at pictures never can. The cost of mistakes is part of the education process.

Use resources like MintpalDecor’s blog, design websites, and social media for inspiration and education. But remember that inspiration should spark your own ideas rather than making you feel like you need to copy someone else’s space exactly. Take what resonates and adapt it to your life and budget.

Start Small and Build Confidence Gradually

The biggest mistake people make is trying to redo their entire home at once. This approach leads to overwhelm, exhaustion, and often poor choices made just to get things finished. Starting small gives you room to learn and adjust as you go.

Choose one room or even one corner of a room as your first project. Maybe it’s making your entryway more welcoming, or creating a cozy reading nook in your bedroom. Small projects let you experiment without huge consequences if things don’t work out perfectly. Success in small spaces builds the confidence you need for bigger projects.

Make one change at a time and live with it before adding the next element. Rearrange your furniture and see how you like it before buying new pieces. Paint one wall as an accent before committing to painting the whole room. Add new lighting and experience how it changes the space before switching out textiles. This gradual approach prevents expensive mistakes and helps you understand what really makes a difference.

Track your progress with before and after photos. It’s easy to forget how far you’ve come when you’re living in the middle of the process. Photos remind you that every small change adds up to significant transformation over time. They also help you see what works and what still needs attention.

Set realistic timelines and budgets. Rome wasn’t built in a day, and neither is a beautifully designed home. Deciding you’ll complete everything in one weekend just sets you up for disappointment. Instead, enjoy the process of gradually creating spaces that feel more and more like you.

Your Journey to Better Interior Design Starts Now

Learning how to be better at interior design MintpalDecor style comes down to understanding that great design is accessible to everyone. It doesn’t require special talents, unlimited budgets, or professional training. It requires paying attention to what makes you feel good, learning a few basic principles, and having the confidence to trust your instincts.

Start by developing your vision for what you want your space to feel like. Understand the core design principles that guide good choices. Discover your personal style by paying attention to what you’re naturally drawn to. Learn how to use color, lighting, and layout to create rooms that work for your real life. Mix textures for depth, shop smart to protect your budget, and add personal touches that tell your story.

Remember that this is a journey, not a destination. Your space will evolve as you learn and grow. Small changes today lead to significant transformations over time. The most important thing is taking that first step, whether it’s rearranging furniture, adding new lighting, or finally painting that wall you’ve been thinking about for months.

Your home should be your favorite place in the world. With the practical, accessible approach that MintpalDecor teaches, you have everything you need to make that happen. Trust yourself, start small, and enjoy watching your spaces transform into places that truly feel like home.