
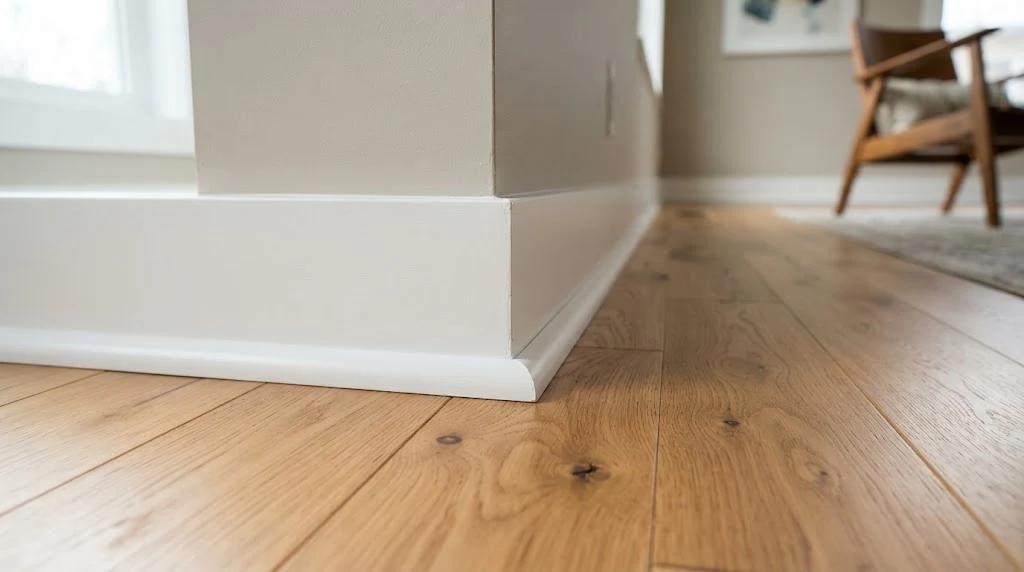
Quarter round molding is a small, curved trim strip shaped like one-fourth of a circle. It sits where your baseboard meets the floor, covering the expansion gap flooring needs. It comes in wood, MDF, and PVC, costs between $2 and $7 per linear foot installed, and most homeowners can install it themselves in a weekend.
Quarter round molding is a thin strip of trim with a curved face shaped like a quarter of a circle. It usually sits at the bottom of your baseboard, right where the baseboard meets the floor. Flooring and baseboards almost never line up perfectly, especially after a new floor goes in. Quarter round bridges that gap with a soft, rounded edge instead of a harsh, visible line.
You’ve probably walked past hundreds of feet of this trim without noticing it. That’s kind of the point. It hides uneven cuts, covers expansion gaps, and gives a room that finished, move-in-ready look that buyers and homeowners both notice, even if they can’t quite say why. It’s a small detail, but skip it and a room looks unfinished no matter how nice the floor is.
Beyond looks, quarter round does real work. Flooring manufacturers recommend leaving a gap along the outer edge of a room to allow for expansion and contraction, since this gap keeps flooring from buckling as it reacts to temperature and humidity changes. Quarter round covers that gap without blocking the movement your floor needs. As a bonus, it can also help save energy by closing off cracks where drafts sneak in and heat escapes.
Quarter Round vs. Shoe Molding

People mix these two up constantly, and honestly, that’s fair. Quarter round is often confused with shoe molding, since the two overlap in purpose. Both trims sit at the base of a wall and cover the same kind of gap.
The difference comes down to shape. Shoe molding has a slightly more tapered, flatter profile, while quarter round keeps that classic, uniform curve. For most standard home projects, quarter round tends to be the easier pick. It’s simpler to cut, easier to find at big box stores, and more forgiving for do-it-yourselfers.
Quarter round also protects the bottom edge of your baseboard from everyday wear. It shields your baseboard from vacuum cleaners, mop heads, and shoes bumping into the wall. That’s a small perk, but over a few years of foot traffic, it adds up.
Materials Used for Quarter Round Molding

You’ll run into three main materials at the store, and each one fits a different budget and use case. Quarter round is made from hardwood, softwood, engineered wood, and extruded plastic. Here’s how they actually compare once they’re on your wall.
Solid wood is the traditional pick, and pine, oak, and poplar are the most common species. Wood takes stain well, so it matches nicely with hardwood floors when you want a seamless look. The tradeoff is price and humidity sensitivity. Wood can warp or crack in damp climates, so it’s not the best fit for a home near the coast or in a consistently humid region.
MDF, or medium-density fiberboard, is the budget-friendly option. It’s pre-primed and ready for paint, cuts cleanly, and doesn’t split easily. The catch is moisture. MDF doesn’t hold up well in bathrooms, laundry rooms, or damp basements, so save it for dry living spaces.
PVC is the newer option, and it’s becoming more popular with LVP and vinyl flooring. It’s a wood alternative that tends to cost less and works well when you want white trim rather than a natural wood look. Since it won’t rot or absorb moisture, PVC is a smart choice for kitchens, bathrooms, and mudrooms.
Standard Sizes and Where to Use It
Most quarter round measures around three-quarters of an inch by three-quarters of an inch. This size is what nearly every prefinished hardwood flooring manufacturer offers to match their flooring. That said, you’ll find other sizes on the shelf depending on how big a gap you need to hide.
If your new flooring sits noticeably higher than your old floor, a bigger profile covers that gap without looking skimpy. This happens often when homeowners install laminate or vinyl plank over an existing subfloor, since the added thickness raises the floor level. Picking a slightly larger quarter round solves that mismatch without replacing the baseboard.
Length matters too when you’re planning a project. Most quarter round comes in eight-foot lengths, though you can also find twelve-foot and sixteen-foot boards for larger rooms where you want fewer seams. Fewer seams mean fewer joints to caulk and fewer spots where gaps might show later.
While quarter round is best known for flooring transitions, it isn’t limited to the perimeter of a room. You can also use quarter round along the edges of staircases, around kitchen islands, or even inside closets. Anywhere flooring meets a vertical surface, this little strip can clean up the line.
How Much Does Quarter Round Molding Cost?
Cost is usually the first question homeowners ask, and the answer depends heavily on material. Material costs alone typically run between fifty cents and four dollars per linear foot, depending on whether you choose MDF, PVC, or solid wood. Wood sits at the top of that range, while MDF and PVC stay closer to the bottom.
Once you add labor, the price climbs a bit more. Quarter round molding costs between three and seven dollars per linear foot with professional installation. A typical carpenter charges by the hour rather than by the foot for smaller jobs. A standard carpenter who specializes in trim work charges thirty to seventy dollars per hour, while a master carpenter charges one hundred to two hundred dollars per hour.
Doing it yourself saves real money. Since quarter round is one of the more forgiving trims to cut and install, many homeowners handle the whole project in an afternoon with just a miter saw and a nail gun. Skipping the labor cost alone can save several hundred dollars on an average-sized home.
How to Install Quarter Round Molding
Installation isn’t complicated, but a few details make the difference between a clean finish and a sloppy one. Start by measuring each wall and cutting your pieces with precise forty-five degree miters at the corners so the joints sit tight and flush. Always double check your angle before you nail anything in place, since a small error at the saw becomes an obvious gap on the wall.
The nailing step matters more than people expect. Use 1-1/2-inch, 18-gauge brad nails to secure the quarter round snugly to the baseboard every 16 to 20 inches, and nail closer together if the wall is unusually uneven. Brad nails leave smaller holes than thicker nails, which makes touch-ups faster and less noticeable later. Whatever you do, don’t nail into the floor.
That last point is worth repeating because it trips up a lot of first-time installers. The whole purpose of quarter round is to cover the expansion gap around the walls, so nailing into the floor restricts the natural movement your flooring needs. Always angle your nails into the baseboard or wall framing instead. If you’re working with hardwood, pre-drilling a small pilot hole first can keep the wood from splitting.
A nail gun with a compressor speeds things up dramatically if you’re doing a whole house. A basic combo kit runs anywhere from about $150 to $300, which pays for itself quickly on a larger project. For a single room, a hand-operated hammer and nail set work fine and cost almost nothing extra.
Finishing Touches: Caulk, Filler, and Paint
The trim isn’t done once it’s nailed up. Fill every nail hole with wood filler, slightly overfilling each one, then let it dry completely before sanding it flush with fine-grit sandpaper. Skipping this step is tempting when you’re tired, but it’s what separates a professional look from a rushed one.
Next comes caulk, and this step matters just as much as the nailing. Apply paintable caulk to the corners and any seams where two pieces meet along a wall, since caulk stays flexible and helps prevent cracks if the wall shifts over time. Run a small bead along the top edge too, then smooth it with a damp finger and wipe away the excess with a wet rag. This tiny bit of extra effort makes the whole room look tighter and more finished.
Once the caulk and filler are fully dry, touch up any scuffed paint. If you primed and painted your quarter round before installing it, this final coat goes fast and covers any marks left from handling and nailing. Stained wood trim follows the same basic order, just swap the wood filler and paint for a matching wood-toned filler, stain, and clear coat.
Is Quarter Round Molding Worth It?
For the price and effort involved, quarter round molding delivers a surprising amount of visual payoff. It hides a gap that would otherwise catch dust, pet hair, and stray debris along every wall in your home. It also protects your baseboard from years of daily bumps and scrapes.
Whether you’re finishing a fresh flooring install or just cleaning up an older room, this small trim makes a noticeable difference. It’s inexpensive, doesn’t take long to install, and works with almost any flooring type you already have. If your baseboards and floor don’t quite meet, quarter round is the simple fix that ties the whole room together.


Comments are closed.